WorldCard HD Help
Overview
Add Contacts
View and Use Contact Profile
Edit Contacts
Export Contacts
Sync Gmail contacts
Move Contacts to Another Group
Groups Management
Find Contacts
Favorites
Maps and Directions
Purchase
Settings
Overview
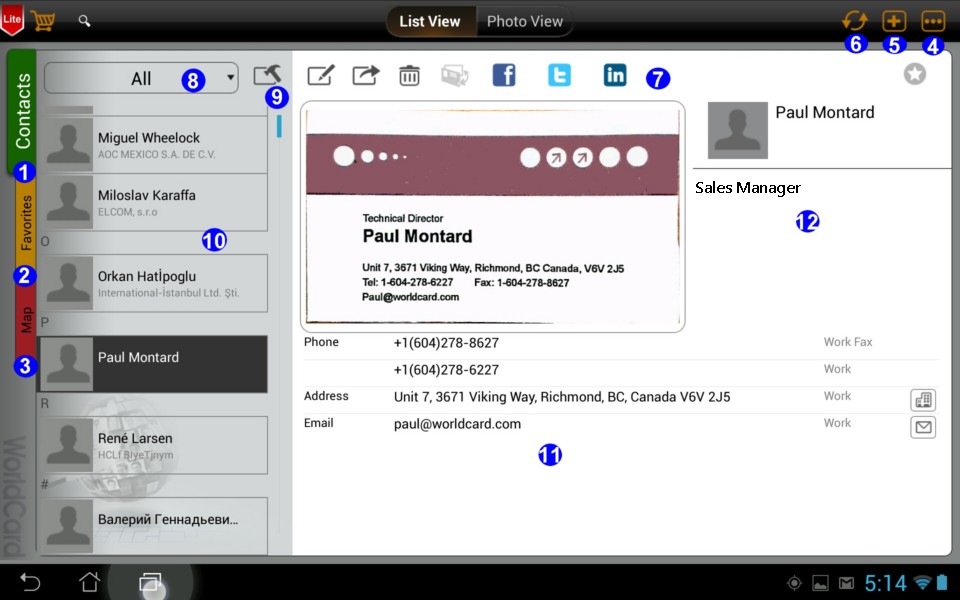
1. Contacts tab
- 2. Favorites tab
- 3. Maps tab
- 4. Settings
- 5. Add contacts
- 6. Sync Gmail contacts manually
- 7.
Toolbar
- 8.
Group
- 9.
Contacts management
- 10.
Contacts list
- 11.
Contact Profile
- 12. Company Profile
Tip: WorldCard HD supports both portrait and landscape orientation.
Return to Content
Add Contacts
Choose one of the following methods to add contacts into WorldCard HD.
a. Create contacts manually
b. Create Contacts from Camera
c. Create Contacts from Existing Photo
d. QR code
e. Email Signaturef. Import
WorldCard file(*.wcxf)
g. Import vCard (*.vcf)
h. Import from cloud storage (*.wcxf)
a.
Create contacts manually
1. Tap  .
.
2. Tap [Add a contact manually] and enter contact information in corresponding fields.
3. Tap [Done] to save the new contact into the current group. Tap [Cancel] to discard the contact.
b. Create Contacts from Camera
1. Tap and select [Camera].
2. Take a picture of the front business card. To recognize the card image correctly, you may like to tap  or
or  to rotate the photo. To zoom in/out the photo, please tap
  .
.
Tips:
- Photo will be lightened and cropped automatically by default. To change the default setting, tap
 . There
are four functions: [Close], [Twist], [Lighten], [Auto].
. There
are four functions: [Close], [Twist], [Lighten], [Auto].
- Tap
 to choose auto or manual focus.
- Tap
 to turn on/off the flash or auto flash.
3. Preview the image. You can tap
 to retake the card image.
4. Choose the recognition language of the card image.
Tips:
- The default setting is what you choose last time, the application will filter duplicate contacts when recognizing.
- WorldCard HD supports English, French,
German, Italian, Spanish, Portuguese, Dutch, Traditional Chinese, Simplified Chinese, Japanese, and Korean.
5. Click  to shoot the back side of the business card image. To recognize the card image correctly, you may like to tap
or to rotate the photo. To zoom in/out the photo, please tap
.
to shoot the back side of the business card image. To recognize the card image correctly, you may like to tap
or to rotate the photo. To zoom in/out the photo, please tap
.
6. Preview the image. You can tap
to retake the card image.
7. Choose the recognition language of the card image.
Tips:- The default setting is what you choose last time, the application will filter duplicate contacts when recognizing.
- WorldCard HD supports English, French,
German, Italian, Spanish, Portuguese, Dutch, Traditional Chinese, Simplified Chinese, Japanese, and Korean.
8. To take pictures continually, tap
 . The number of pictures that you already took will be shown on the right
 .
.
Tip: Back to the main screen and check the
unverified category, you can see all card images showed
with the  icon, which means they are unverified. Once you have verified them and
defined their group, the icon will disappear. To learn more about how to move a contact to a group, please refer to
Move Contacts to Another Group. Learn more about how to add new groups, please refer to
Groups Management
icon, which means they are unverified. Once you have verified them and
defined their group, the icon will disappear. To learn more about how to move a contact to a group, please refer to
Move Contacts to Another Group. Learn more about how to add new groups, please refer to
Groups Management
9. Tap [Done] to recognize the card image. After the recognition is completed, confirm or edit your contact information.
Tip: To learn more about how to edit the contact after recognition, please refer to
Edit this contact.
10. Tap [Done] to save your new contact into Card Holder. If you want to discard, please tap [Cancel].
c.
Create Contacts from Gallery
1. Tap
2. Select [Choose Existing Photo].
3. Choose a business card image from your gallery.
Tip: Tap
or
to rotate the card image.
4. Choose a recognition language.
Tip: The default is what you chose last time, the application will filter duplicate contacts when recognizing. WorldCard HD supports English, French, German, Italian,
Spanish, Portuguese, Dutch, Traditional Chinese, Simplified Chinese,
Japanese, and Korean.
5. Tap [Done] to recognize the card image. After the recognition is completed, confirm or edit your contact information.
Tip: To learn more about how to edit the contact after recognition, please refer to
Edit this contact.
6. Tap [Done] to save your new contact into Card Holder. If you want to discard it, please tap [Cancel].
d. QR code
1. Tap
and choos [QR Code] to launch the camera to scan.
2. Use the camera to focus the QR code, the
camera will auto focus the QR code and scan.
3.
Check contact information and tap [Done] to save.
e.
Email Signature
1. Open any document with email
signature information (ex. Gmail).
2. Select and copy the text that you want to
recognize in the email signature section.
3. Return to WorldCard HD, tap
and select [Email Signature].
4. Tap [Recognize]. WorldCard HD will recognize the
text you have chosen and then automatically build the contact info according to
the attribute of each column.
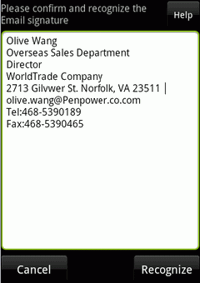
5. After the
recognition is completed, confirm or edit your contact info. To learn more about
how to edit the recognition result, please refer to chapter [Edit Contact].
6. Tap [Done] to save your new contact to Card
Holder.
f.
Import WorldCard file(*.wcxf)
1. Tap
and select
[Import WorldCard file(*.wcxf)] to import one .wcxf file from the SD card.
Note: The proprietary *.wcxf (WorldCard Exchange File) format
is used for interchange of contacts between WorldCard series. WorldCard series,
released by Penpower Technology Ltd, is business card recognition and contact
management products, running on different platforms, ranging from WorldCard
(Windows), WorldCard Mac (Mac OS X) to WorldCard HD/WorldCard Mobile/WorldCard
Contacts on iOS, android and Windows phones.
2. Select a *.wcxf file from the import files list.
Note: WorldCard HD will filter out duplicate contacts
automatically.
3. Then the contacts will be imported right away.
g. Import vCard (*.vcf)
If there is any .vcf file in the SD card, you can open the vCard file directly
with WorldCard HD, or import the vCard file in the WorldCard HD.
1. Tap
and select [Import vCard(.vcf)].
2. Choose the file you want to import and tap [OK].
h.
Import from cloud storage (*.wcxf)
If you
ever exported the contacts as wcxf file and saved in the the cloud storage, you
can import them from the cloud storage.
1. Tap
,
and select [Import from cloud storage (*.wcxf)].
2. Choose the file in the list and tap [OK]
to start.
Return
to Content
View and Use Contact Profile
a. the list view mode
b. the photo view mode
c. use contact profile
Tips:
1. You can use the index or search function to quickly find a contact. Contacts are sorted by contact name field by default. You can set the
sorting order in
Settings.
2. To enter into another group, please tap on the group name and select a group from the group list.
a. the list view mode
In the List View mode
 , your contacts appear in ordered rows containing information, such as the
thumbnail of profile photo, name, and company. To view the contact profile in the List View mode, please
, your contacts appear in ordered rows containing information, such as the
thumbnail of profile photo, name, and company. To view the contact profile in the List View mode, please

1. Select a contact from the contact list.
2. The contact profile will be displayed on screen.
Tip:
In the portrait List View mode, please tap
 on the toolbar to switch the contact list.
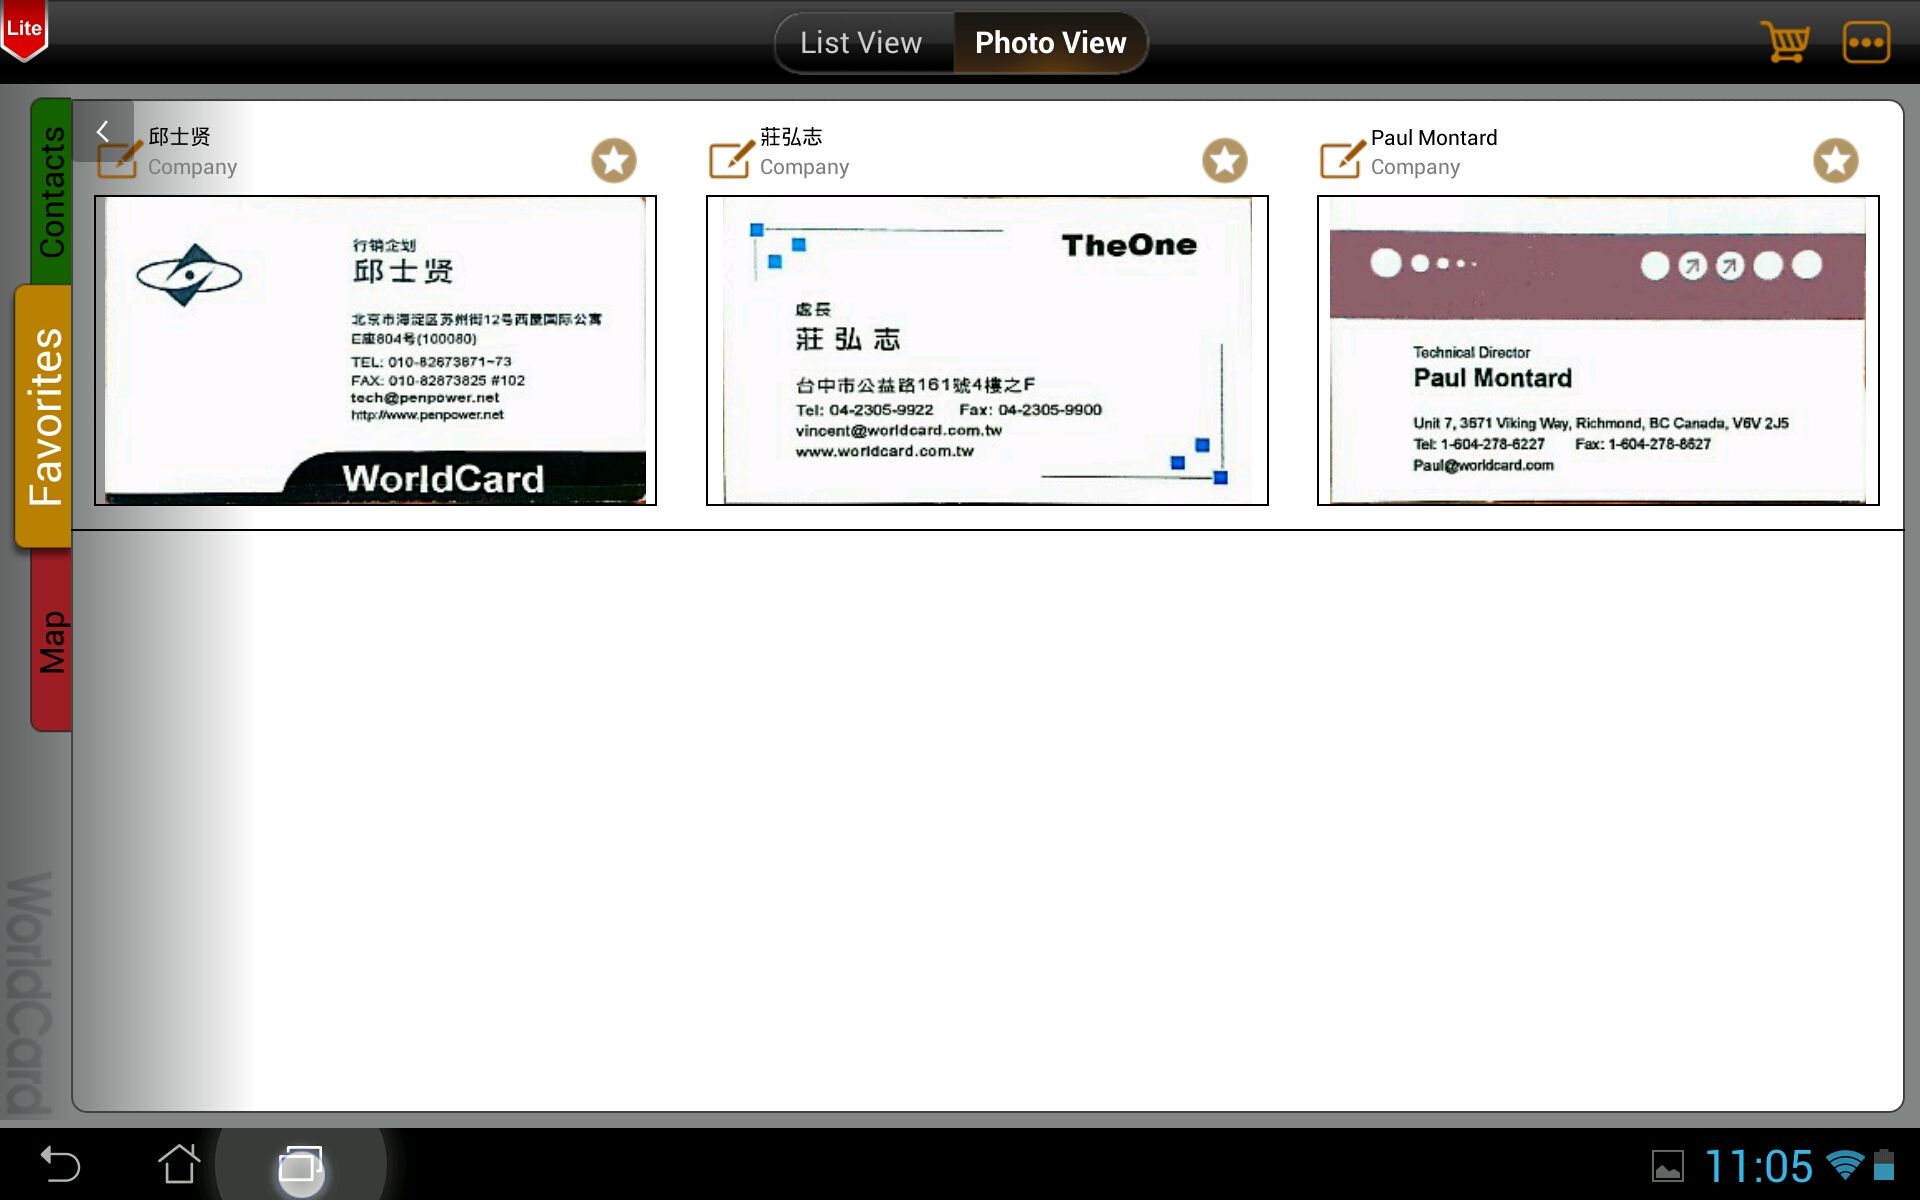
b. the photo view mode
The Photo View mode
 displays contacts by listing the card images for easy identification.
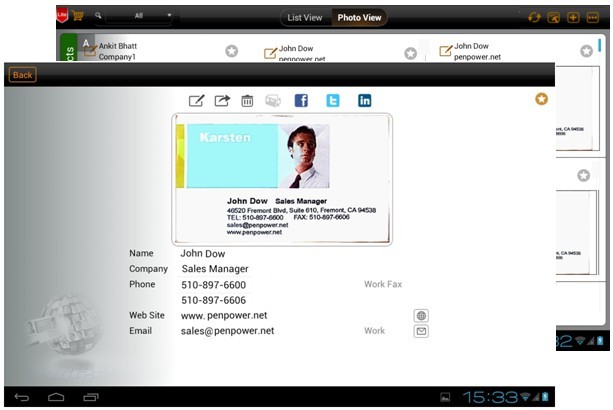
To view contact profile in the Photo View mode, please
:
1. Select a card image.
2. The contact profile will be displayed on screen right away.
3. Flick through the card image to view the next or previous contact profile.
c. use contact profile
You can use contact information to:
share / export
switch to front/back card image
find the contact quickly
in Facebook, Twitter, or LinkedIn
email to the
contact
visit the contact’s
website
check the contact's location on map
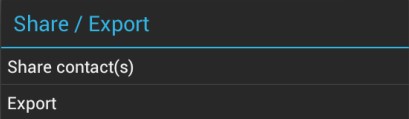
share / export
While browsing the contact profile, tap
 .
.
-
Share Contact(s)
Select [Share contact(s)] . Then
-
Select [vCard file(*.vcf)] to share this contact in the vCard format with the
card image by mail or other service.
-
Select [CSV file(*.csv)] to share this contact in the csv format by mail or
other service.
-
Select [WorldCard file(*.wcxf)] to share this contact in the .wcxf format by
mail or other service.
-
Export
-
Select [vCard file(*.vcf)] to export this contact as a vCard file .
-
Select [CSV file(*.csv)] to export this contact as a csv file .
-
Select [WorldCard file(*.wcxf)] to export this contact as a .wcxf file .
-
Select [Save to Phone Contacts] and you can also save this contact to the
phone's [Contacts] app, your Google or Exchange account.
Note: The default exported path is [/sdcard/WorldCardHD/Export/].
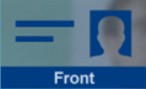
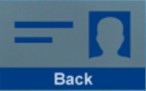
switch to front/back card image
While browsing the contact profile, tap
 to switch to the front or the back of the card image.
find the contact quickly in Facebook, Twitter, or LinkedIn
-
Please tap
 ,
,
 ,
or
,
or  .
.
-
Then you can make a quick search of the contact on Facebook, Twitter, or
LinkedIn.
email to the contact
Tap the email address to send an email message to the contact.
visit the contact’s website
Tap the URL link to visit the website.
check the contact's location on
map
While you are browsing the contact’s profile, tap the address field to link to
Google Maps and show the location of the address on the map.
Note: To use Google Maps, please go [Settings]/[Location Services] in the
tablet to turn on the [Use wireless networks] function first.
Return to Content
Edit Contacts
Select a contact and tap on the Edit icon
 to
to
edit contact information
edit profile photos
edit card images
re-recognize card images
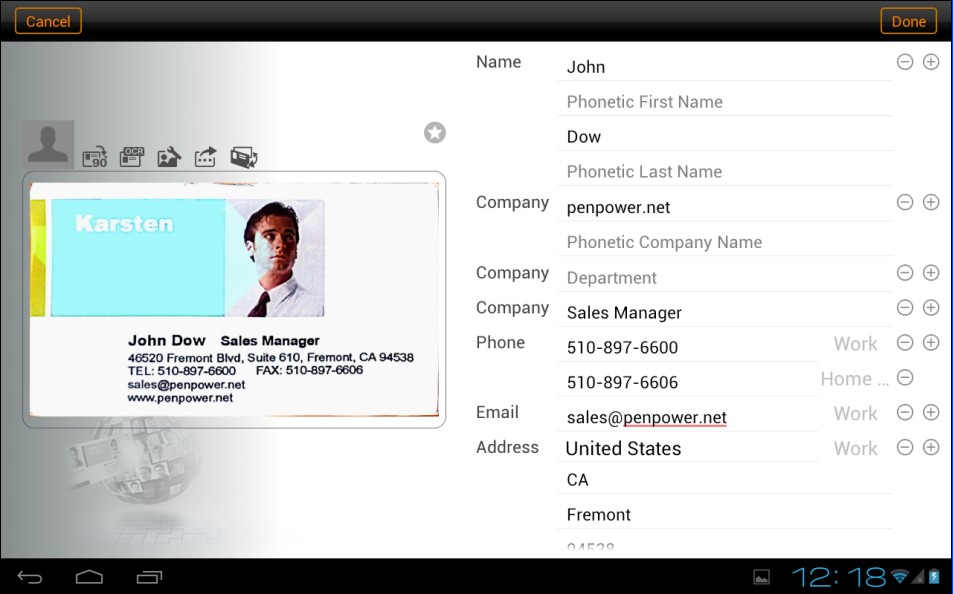
edit contact information
add
or edit field below the current field
delete a field
add or edit the label of a field
add or edit field below the current field
- Tap
 and
enter information to add another field below the current field.
and
enter information to add another field below the current field.
- Tap [Done] to save the
modification.
delete a field
- Tap
 to delete a field.
- Tap [Done] to save the modification.
add or edit the label of a field
Every field has a default label. To change the label, please:
- Tap on the label of the field that you want to change. For example, tap Work of the Email field.
- Select a new label name in the pop-up menu to replace the original. For example, choose Home to replace Work.
- Tap [Done] to save the modification.
edit profile photos
Tap on the profile photo
 to:
to:
add a profile image
change the profile image
delete the profile image
add a profile image
You could assign a photo to a contact for easy identification.
- There are three ways to add a profile image. Choose [Load photo from Gallery] to select an existing photo, [Capture photo
from Camera] to take a picture or [Business card] to crop the card image as your profile image, then you can adjust or crop the image.
- Tap [Done] to save the modification.
change the profile image
- There are three ways to change the profile image. Choose [Load photo from Gallery] to select an existing photo, [Capture photo from Camera] to take a picture or [Business card] to crop the card image as your profile image, then you can adjust or crop the image.
- Tap [Done] to save the modification.
delete the profile image
- Select [Delete Photo].
- Tap [Done] to save the modification.
edit card image
add, change, or delete the card image
rotate, sharpen, or crop the card image
add, change, or delete the card image
Tap
 to
add card image or change card image.
to
add card image or change card image.
add a card image
- Select [Replace the front side image from Gallery] or [Replace the front side image from Camera] to get a card image for the front side of the business card.
- Select [Add the back side image from Gallery] or [Add the back side image from Camera]to get a card image for the back side of the business card.
- Then the new card image will be added to this contact.
Tap [Done] to save the modification.
change the image of the card
- Select [Replace the front/ back side image from Gallery] or [Replace the front/ back side image from Camera] to get a card image to replace the front side or back side of the business card.
Tips:
- Tap to switch to the front or the back side of the card image.
- Select [Replace with fake card] to replace the current card image with a default card image.
- The new card image will replace the old card image.
- Tap [Done] to save the modification.
delete the image of the card
- Select [Delete the front/ back side image] to delete the card image.
Tip: Tap to switch to the front or the back side of the card image.
- Tap [Yes] to delete.
- Tap [Done] to save the modification.
Note: After you delete a card image, WorldCard HD will create a visual business card for this contact.
rotate, sharpen, or crop the card image
rotate
- Tap
 to rotate the image by 90 degrees to the right.
- Tap [Done] to save the change.
sharpen and crop
- Tap
 .
.
- Tap
 to sharpen the image or
  to crop the image.
- sharpen: make the card image much clearer.
- crop: you can adjust the position and size of card image by dragging the four points of the corner.
- Tap [Done] to save the change.
re-recognize the card
- Choose a side to re-recognize by tapping .
- Tap
 .
.
- Select the recognition language to start recognizing.
- You will then see the re-recognized results be added to the contact profile.
- Tap [Done] to save the change.
Return to Content
Export Contacts
1. Please tap the Contact Management icon  .
.
2. Select the contacts you want to export.
3. Tap  .
.
4. Then choose one of the following ways to export contacts.
Tip: Tap  to select all contacts in the targeted group at one time.
a. share contacts
b. export
share
contacts
- Select [vCard file(*.vcf)] to share this contact in the vCard format by mail or other service.
- Select [CSV file(*.csv)] to share this contact in the csv format by mail or other service.
- Select [WorldCard file(*.wcxf)] to share this contact in the .wcxf format by mail or other service.
Note: The proprietary *.wcxf (WorldCard Exchange File) format is used for the interoperable interchange of contacts between WorldCard series. WorldCard series, released by Penpower Technology, are business card recognition and contact management products, running on different platforms, ranging from WorldCard (Windows), WorldCard Mac (Mac OS X) to WorldCard HD/WorldCard Mobile/WorldCard Contacts (iPad/iPhone/iPod touch).
export
- Select [vCard file(*.vcf)] to export this contact as a vCard file .
- Select [CSV file(*.csv)] to export this contact as a csv file .
- Select [WorldCard file(*.wcxf)] to export this contact as a .wcxf file .
- Select [Save to Phone Contacts] and you can also save this contact to the phone's [Contacts] app, your Google or Exchange account.
Note: The default exported path is [/sdcard/WorldCardHD/Export/].
Return to Content
Sync Gmail contacts
-
If you tap
 before you set up any Gmail
account, the account setting page will show, please enter your Gmail account
first.
before you set up any Gmail
account, the account setting page will show, please enter your Gmail account
first.
- Tap
,
WorldCard HD will start to sync immediately.
- If the [Auto Sync] is checked,
WorldCard HD will auto sync your Gmail
contacts every five minutes, if it is not be checked, WorldCard HD will not
auto sync your Gmail contacts. If you saw
 ,
it means there is a problem of syncing, If you saw
,
it means there is a problem of syncing, If you saw ,
please check your internet and
account setting are OK, it will back to normal after the synchronization is
complete.
,
please check your internet and
account setting are OK, it will back to normal after the synchronization is
complete.
After syncing, there will be a default Gmail group appeared in the group
list, this group cannot be modified or deleted.
Return to Content
Move Contacts to Another Group
- Please tap the Contact Management icon .
- Select the contacts you want to move to another group.
- Tap
 and choose the target groups.
- Tap [Yes] and the change takes effect right away after you select the target groups.
Return to Content
Groups Management
Tap on the group name
 on the main screen to
enter into another group
add a new group
delete a group
enter into another group
1. Tap on the group name.
2. Select a group in the group list to view and access the contacts in this group.
add a new group
1. Tap
 .
.
2. Enter a new group name.
3. Then tap [Done] to save the change.
delete a group
1. Tap
 .
.
2. Tap next to an item, then [Delete] to delete the group.
3. Tap [Done] to save the change.
Note: Group "All" and "Unfiled" are preset groups that cannot be deleted.
Return to Content
Find Contacts
To find a contact quickly, you can simply jump to a group, use the searching function, or use the index to jump to a letter.
group contacts
If you know the contact that you are searching for is in a group, you can simply jump to that group to get the contact. Please refer to
enter into another group.
-
search contacts by keywords
1. Tap  .
.
2. Type keywords in the search field.
Note: The fields of name, company, job title, department, address, telephone, and the like are searched.
3.The search results are shown as you type.
Note: By default, searching is done on the current group. Go to Group All to search all contacts.
Return to Content
Favorites
add contacts to Favorites
view contacts in Favorites
remove contacts from Favorites
add contacts to Favorites
To mark the contacts you use frequently as favorites, please select a contact. Tap Favorites
 at the upper right corner of the screen. When the icon becomes
 , it means this contact is added in Favorites.
view contacts in Favorites
- Tap the Favorites tab on the main screen.
- Choose one contact from Favorites to view the contact profile.
remove contacts from Favorites
- In the Favorites tab, choose a contact.
- To remove a contact from Favorites, please tap at the upper right corner of the screen to make the star icon turn to .
Return to Content
Maps and directions
- In the Map tab select a contact.
Note: To use Google Maps, please go [Settings]/[Location Services] in the tablet to turn on the [Use wireless networks] function first.
- This contact's location will be displayed on the map, along with other contacts near this one.
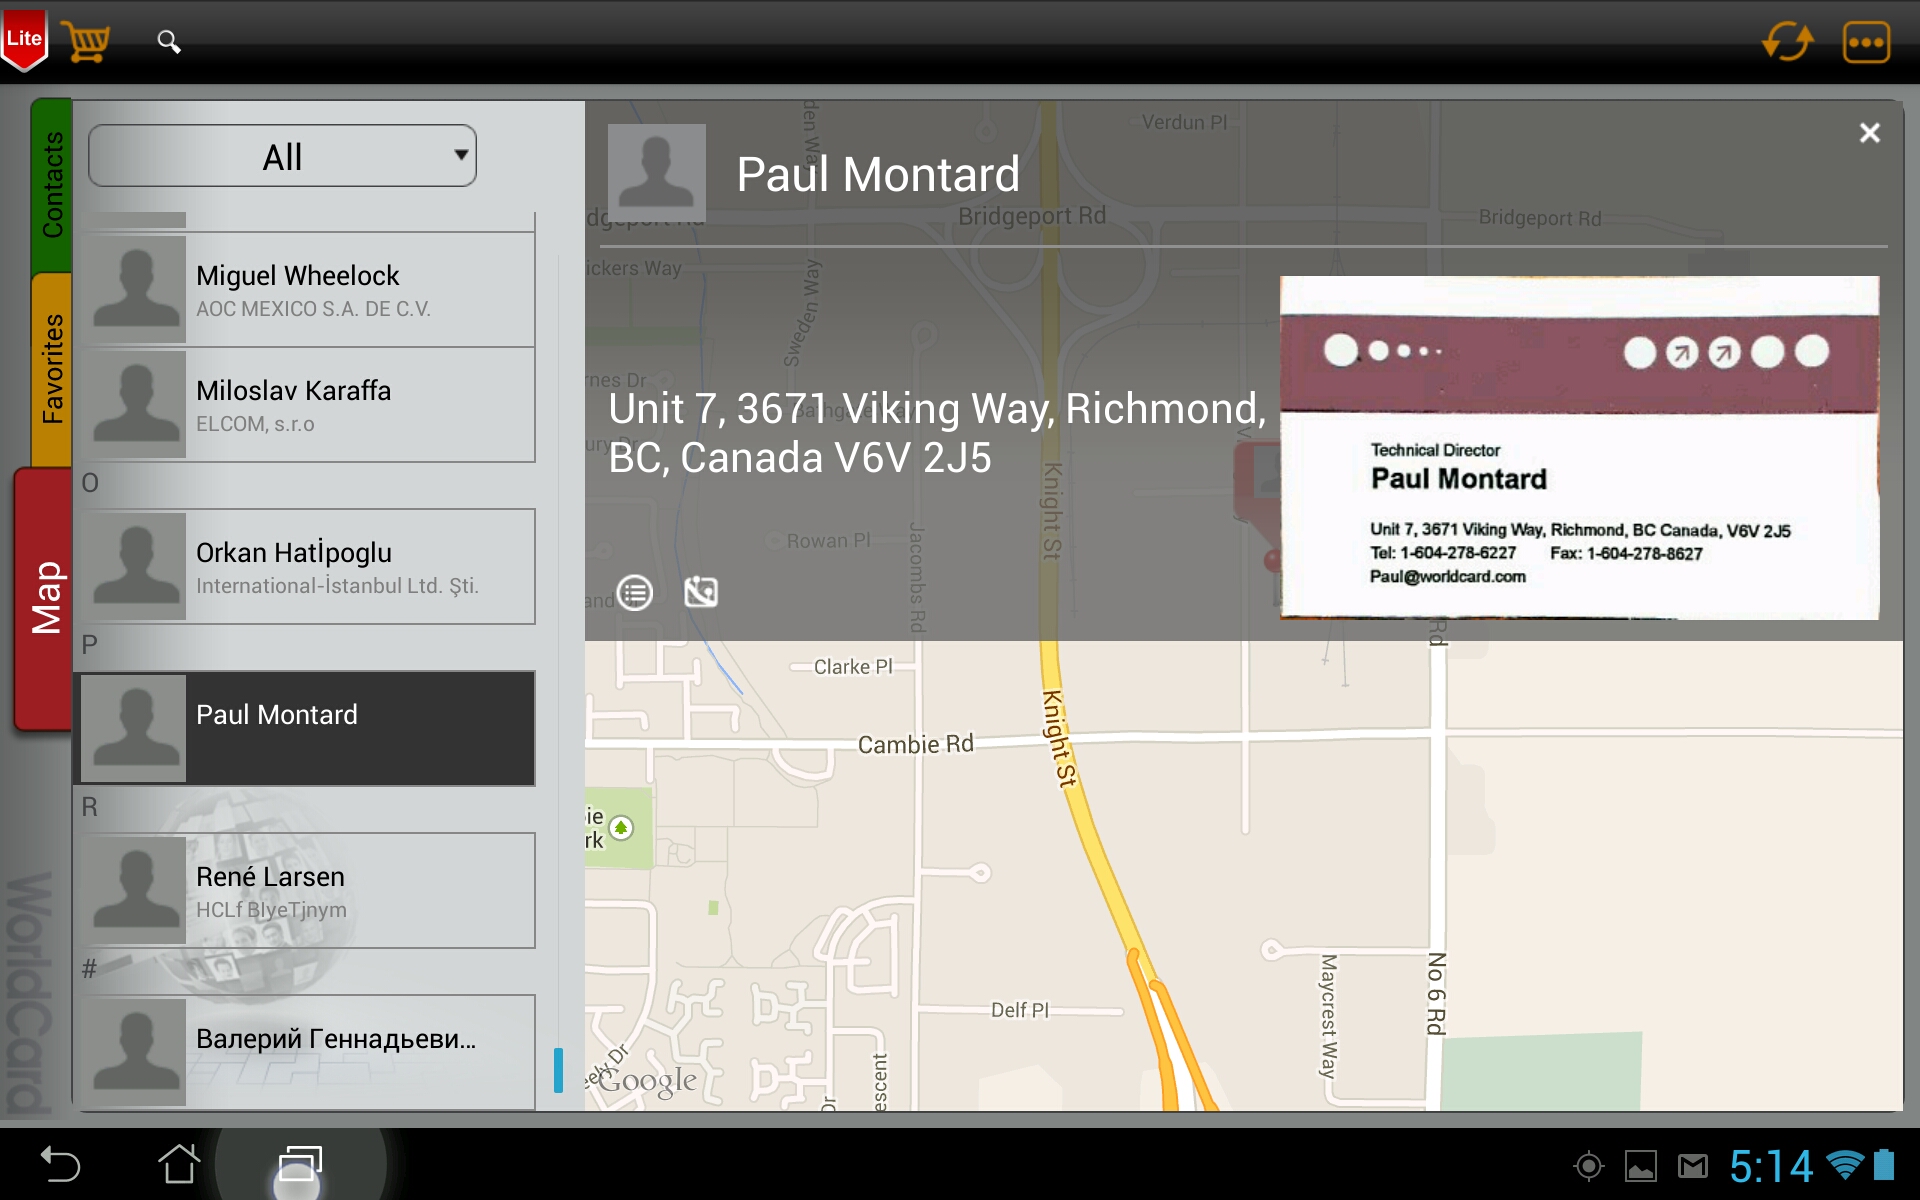
Tip: While you are browsing the contact’s profile, tap the address field to link to Google Maps and show the location of the address on the map.
- Tap this contact on the map and you can browse the information about this contact.
Tip: If there is more than one contact having the same address, tap to select the contact you want to browse in the pop-up menu.
- Tap
 to view the profile in the Contacts tab.
- Tap
 to get directions between your current location and this contact’s.
- Tap
 to close this window.
Return to Content
Purchase
WorldCard HD is allowed to add/delete contacts for 50 times by default (if you delete a contact that also counts as one), and you can tap  to upgrade to an unlimited version.
- Lite Version
 : Free, limited quota.
- Full Version (quota unlimited): Purchase full version for saving contacts without quota limit.
Return to Content
Settings
Tap  and select [Settings] to customize your own preferences.
Sync
Display
General
Backup and Restore
Recognize
About
Sync
You can add the Gmail account to sync, and decide to let
WorldCard HD sync
with that account automatically or not.
Display
- Eastern Name Order: Set display sequence of the first name and last name for Chinese, Japanese and Korean names.
- Western Name Order: Set display sequence of the first name and last name.
- Sorting by Field: Set the indexing criteria as Contact Name or Company Name.
General
Index Mode:
-
English Alphabet:
Set the index to follow the English Alphabet order.
-
Chinese Stroke:
Set the index to follow the Chinese stroke order.
-
Chinese HanPin:
Set the index to follow the Chinese Pinyin order.
-
Chinese ZhuYin:
Set the index to follow the Chinese Zhuyin order.
-
Japanese Phonetic:
Set the index to follow the Japanese Phonetic.
-
Korean Phonetic:
Set the index to follow the Korean Phonetic.
Find Duplicate Data:
-
Tap this option.
-
The duplicated contacts will be listed on screen.
-
Tap on a contact to view the profile of this contact.
-
Tap
next to an item to delete this contact.
Backup and Restore
Cloud Storage
Tap to log in the cloud storage which you want to
use to backup your files.
Backup path
The backup files on the local will be saved in a
default specific path, you can tap it to change the save location to cloud
storage.
Backup
-
To backup, tap [Backup].
After the backup process is completed, please tap [Done].
Restore
-
Tap [Restore].
-
Select a file to restore.
-
After the restoring process is completed, please tap [Done].
Important: Please note
that the contact database in WorldCard HD will be replaced with the backup file.
Save to Phone Contacts
The card data will also be auto saved to your
phone's contacts, Gmail contacts or Exchange contacts after recognizing if you
turn on this option. When auto saving to Gmail account, please be aware of not
choosing the same Gmail account which you are used to auto sync with.
All Contacts
Tap to set which contacts of the system account
group you are going to auto save the recognized data.
Recognize
Proceed formatting
Turn on this option to auto format the contact's phone number
to clear the * or # etc. symbols.
Add country code
Choose to auto add country
code or not after formatting phone number.
About
Tap to see the information of WorldCard HD.
Return to Content
2015/05/21