WorldCard Link Help
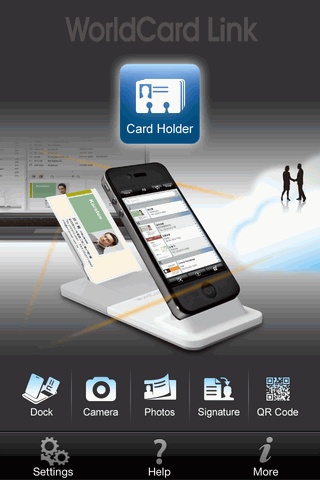
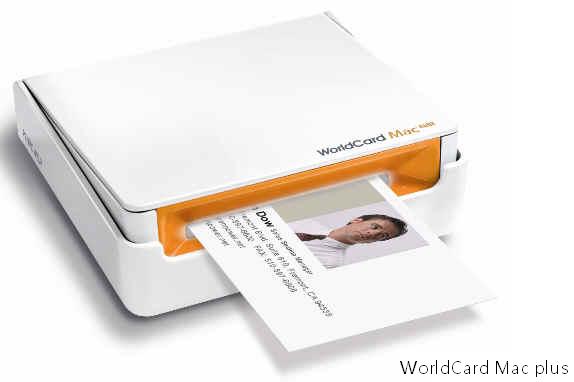
WroldCard Link contains an iOS app and an iPhone stand. Together, it makes managing business cards on iPhone or in the cloud so much simpler. Besides business card capturing automatically, the stand also provides power charge and data transmit functions. WorldCard Link provides the new Card Holder function to view, sort, and export the contact information. Besides, you can save business card information in card holder either through the photo taken by the built-in camera, through photo available in albums, from e-mail signature, from QR codes, or import wcxf files from the cloud service. Moreover, you can synchronize your Gmail Contacts in Gmail account with WorldCard Link.
Card Holder
WorldCard Link's Card Holder has two contact sources, Local Contacts and Cloud Contacts. You can add, use, manage, and export contacts. Loccal Contacts can be used to manage contacts in the mobile phone. Cloud Contacts can be used to manage contacts which can be synchronized with Gmail Contacts in Google account. You can select which group you want to save contacts.
Tap  on the app's main screen to launch Card Holder and it has two view modes: List Mode and Cover Flow.
List Mode
Tap the icon in the main screen and you will be taken to the List Mode right away. Contacts are sorted alphabetically and displayed on the screen.
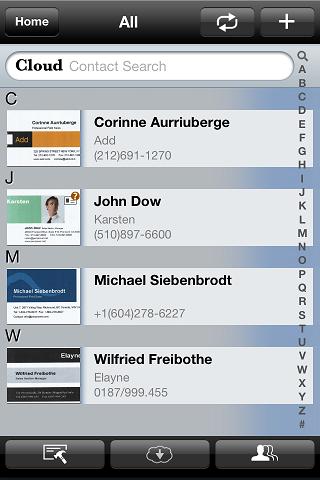
 Home - Tap to return to the app's main screen.
 - Display the current group's name.
 Add Contacts into Card Holder - Tap to select a way to add contacts into Card Holder.
 Group - Tap to select a contact's source and show the group list so that you can choose or edit.
 Select multiple contacts - Select multiple contacts to save them to cloud services, move to another group, delete them, export them, or send email/messages to them.
 Import from cloud - Import contacts from iCloud or Dropbox.
 Gmail Contacts Sync - Tap to synchronize with the Google Contacts when the contact's source is Cloud Contacts.
 Search contacts - Enter keywords to search contacts.
- Index bar - Tap on any character to quickly find the contact you want to view.
Note: In the list mode, the contact with a  icon means the contact is unverified. You can also find the unverified contacts in the [unverified] group
Add Contacts into Card Holder
Choose one of the following methods to add contacts into Card Holder.
a. Create Contacts from Dock Mode
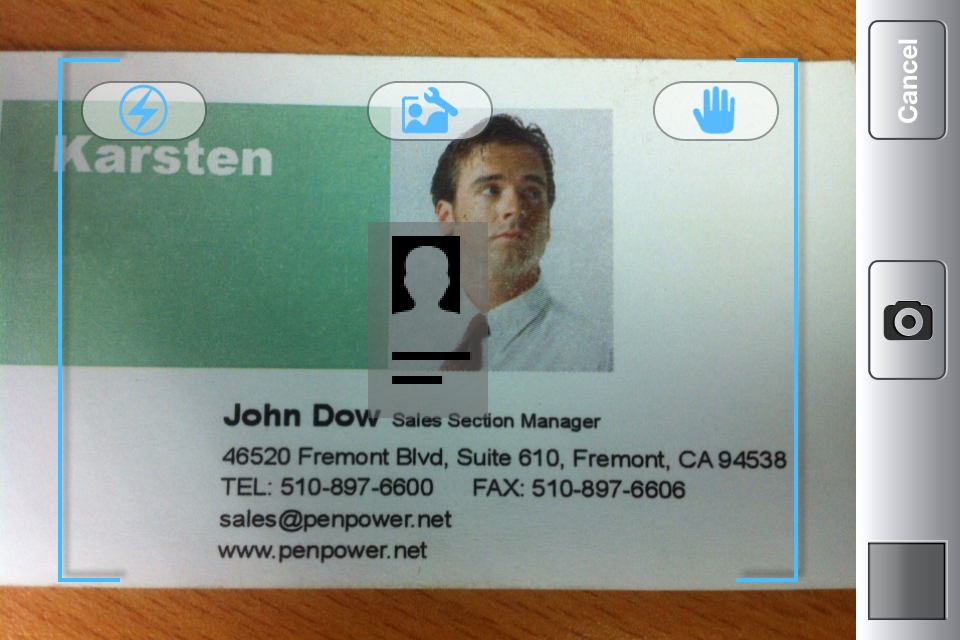
b. Create Contacts from Camera
c. Create Contacts from Albums
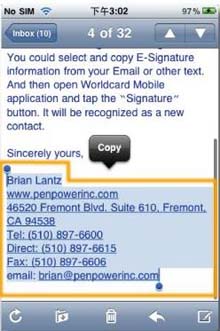
d. Recognize Email Signatures
e. Recognize QR Code
f. Import from iPhone Contacts
g. Import from the Cloud
h. Gmail Contacts Sync
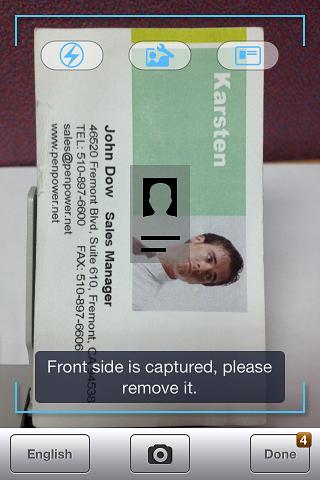
a. Create Contacts from Dock Mode
- Tap
 on the main screen or tap in the Card Holder to select [Dock Mode].
Tip:
- Tap
 to turn on the flash function, or tap
  to turn on the photo enhancement function.
- Tap
 to select [Single Side Recognition Mode] or [Double Side Recognition Mode]. With Double Side Recognition Mode, WorldCard Link helps you to capture the contact information on the front and back side of a business card.
- Select a proper recognition language in the lower-left corner of the screen. This version supports English, French, German, Italian, Spanish, Spanish (Mexican), Portuguese, Portuguese (Brazil), Dutch, Traditional Chinese, Simplified Chinese, Japanese, Korean, Polish, Hungarian, Czech, Slovak, Russian, Turkish, Danish, Finnish, Greek, Swedish, and Norwegian.
- Put your iPhone on the iPhone stand. WorldCard Link will arm itself after cuing of [PENPOWER] on the business card stand. Once the app is armed, as soon as you put a business card on the card stand, the app will capture it automatically.
Notes:
1.) Please take snapshots in good lighting conditions and reduce or eliminate light reflection and casting shadows. If you are in a low-light condition, please tap the flash button to enable the flash function. (Tap it again to disable the flash function).
2.) Tap on the screen to focus if you found the camera preview was out of focus.
- If you selected [Double Side Recognition Mode], the system will remind you to capture the back side image
 . Removing the card off of the card stand will arm the app again for your next business card or the back side of your current business card.
- Tap the [Done] icon to start recognizing the card images.
Note: You can find the unverified contacts in Card Holder. Tap to edit them.
b. Create Contacts from Camera
- Tap
 on the main screen or tap in the Card Holder to select [Take Photo].
- Tap
 to turn on Anti-Shake Mode, tap to turn on the flash function, or tap to turn on the photo enhancement function.
Notes:
1). When photographing your business card, use the small business card image in the center of the preview window as a guide for proper orientation.
2). You can rotate iPhone sideways to make sure the whole business card image is completely in the frame area.
3). Please take snapshots in good lighting conditions and reduce or eliminate light reflection and casting shadows. If you are in a low-light condition, please tap the flash button to enable the flash function. (Tap it again to disable the flash function).
- Tap
 to take a photo of the business card and preview the image.
- In the preview frame, you can:
- Tap
 or
or  to rotate the image.
- Select a proper recognition language in the lower-left corner of the screen. This version supports English, French, German, Italian, Spanish, Spanish (Mexican), Portuguese, Portuguese (Brazil), Dutch, Traditional Chinese, Simplified Chinese, Japanese, Korean, Polish, Hungarian, Czech, Slovak, Russian, Turkish, Danish, Finnish, Greek, Swedish, and Norwegian.
- If you are not satisfied with the image quality, you can tap [Back] to retake a photo.
- Tap the [Done] icon to start recognizing this card image and edit it when necessary. If you want to recognize the back side of the business card, just tap
 icon to capture the back side image and the contact information of the business card. If you want to recognize more images, just tap
  icon to recognize next business card.
Note: You can find the unverified contacts in the [unverified] group. Tap to edit and move these contacts to another group.
c. Create Contacts from Albums
- Tap
 on the main screen or tap in the Card Holder to select [Choose Existing Photo].
- Choose a business card image from albums and preview the image.
- In the preview frame, you can:
- Tap or to rotate the image.
- Select a proper recognition language in the lower-left corner of the screen. This version supports English, French, German, Italian, Spanish, Spanish (Mexican), Portuguese, Portuguese (Brazil), Dutch, Traditional Chinese, Simplified Chinese, Japanese, Korean, Polish, Hungarian, Czech, Slovak, Russian, Turkish, Danish, Finnish, Greek, Swedish, and Norwegian.
- If you are not satisfied with the image quality, you can tap [Back] to retake a photo.
- Tap the [Done] icon to start recognizing this card image and edit it when necessary. If you want to recognize the back side of the business card, just tap icon to select the back side image and the contact information of the business card will be recognized also. If you want to recognize more images, just tap icon to recognize next business card.
Note: You can find the unverified contacts in the [unverified] group. Tap to edit and move these contacts to another group.
d. Recognize Email Signatures
- Open any document with email signature information (ex. E-mail).
- Select and copy the text that you want to recognize in the email signature section.
- Return to WorldCard Link and tap the
 icon or tap in the Card Holder to select [Signature].
- Tap the [Recognize] icon. WorldCard Link will recognize the text you have chosen and then automatically build the contact info according to the attribute of each column.
Tip: WorldCard Link will create a virtual card image for the contact recognized from Email signature.
- Tap the [Done] icon and the info will save to Card Holder.
Note: If the contact information is saved in the Loccal Contacts, you can select to save the contact to iPhone contacts as well.
e. Recognize QR Codes
A quick response (QR) code holds a lot of information. WorldCard Link can read QR codes on business cards and create new contacts.
- Tap
 on the main screen or tap in the Card Holder to select [QR Code].
- Position the QR code within the green frame and the QR code image will be captured automatically.
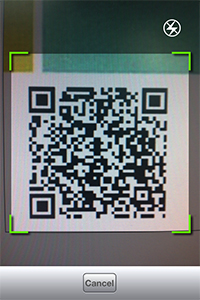
- Tap the [Recognize] icon. WorldCard Link will recognize the QR code and sort the information into the proper fields automatically.
Tip: WorldCard Link will create a virtual card image for the contact recognized from QR code.
- Tap the [Done] icon and the info will save to Card Holder.
- If you don't want to save the information, tap [Discard] to give up the recognition result.
Note: If the contact information is saved in the Loccal Contacts, you can select to save the contact to iPhone contacts as well, and then tap [Merge with the existing contact] to choose an existing contact to merge with.
f. Import from iPhone Contacts
- Tap in the Card Holder to select [Import from iPhone Contacts].
- Select the contacts you want to import into WorldCard Mobile.
Tips:You can select all contacts in a group by tapping  .
.
- Tap [Done] to import contacts.
g. Import from the Cloud
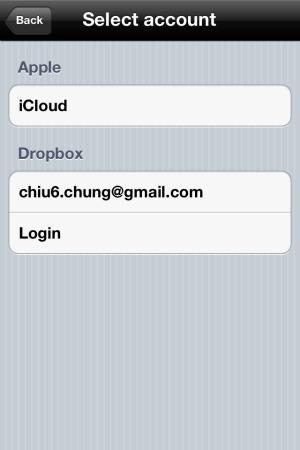
Tap in the Card Holder and select a cloud service as the import source: iCloud or Dropbox.
Notes:
1. Only iOS 5 or above supports the iCloud function.
2. Please create an account if you do not currently have one. For iCloud, please go to the [Settings\iCloud] page on your iPhone screen. If you don't have a Dropbox account, please create one first.
3. WorldCard Exchange files are saved in the [WorldCard\DataExchange] folder by default.
iCloud
- Select iCloud as the import source.
- Select a .wcxf file from the import file list.
Tip: You can select more than one .wcxf file at one time.
- Scroll down to the bottom and tap [Import] to start the import process.
- Tap [Yes] to continue importing the contacts.
- Tap [OK] to exit the import window.
Dropbox
- Select Dropbox as the import source.
- Login your Dropbox account and tap [Done].
- Select a .wcxf file from the import file list.
Tip: You can select more than one .wcxf file at one time.
- Scroll down to the bottom and tap [Import] to start the import process.
- Tap [Yes] to continue importing the contacts.
- Tap [OK] to exit the import window.
h. Gmail Contacts Sync
WorldCard Link provides two contact's sources, Loccal Contacts and Cloud Contacts, to manage the contacts information. Cloud Contacts can be used for synchronizing with the Gmail Contacts. Set the current contacts as Cloud Contacts and you can start to synchronize.
- Tap in the Card Holder or tap settings
 to set the current contacts as [Cloud Contacts].
Tips:
1. Before synchronization, please go to [settings] / [Account] in app to setup your Google account information.
2. When setting the current contacts as Cloud Contacts, the search bar in the Card Holder will show [Cloud Contact search].
- Tap icon in the card holder to synchronize Google Contacts.
- You will see how many contacts will be changed between local side and remote side after synchronization.
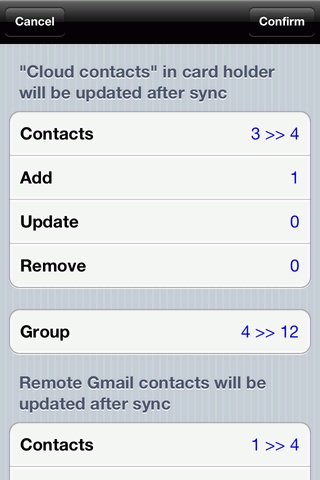
- Tap [Done] to finish the synchronization.
Note:
It is recommended to synchronize when iPhone’s power is full or connecting with a power supply.
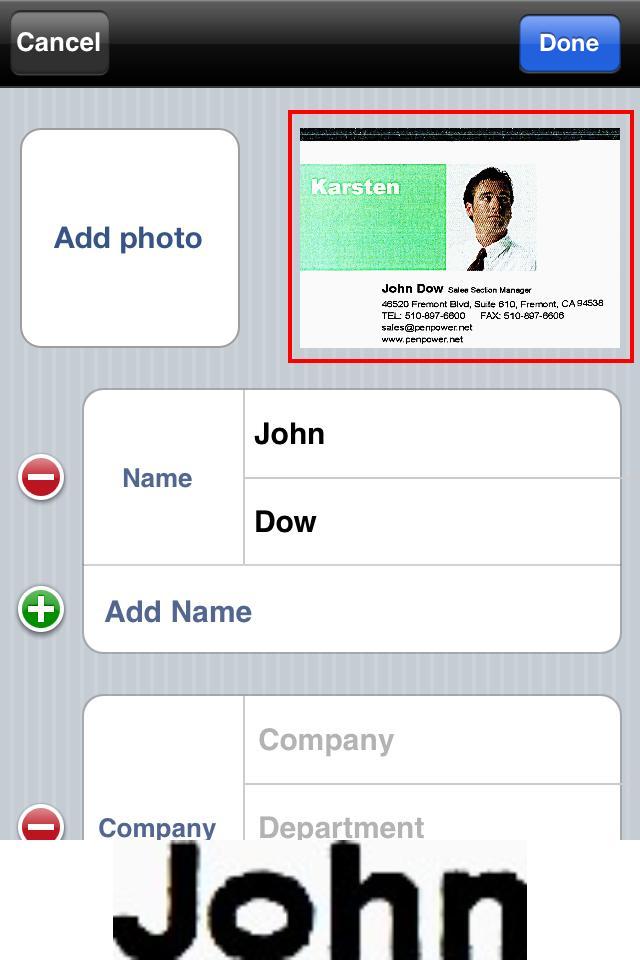
Edit Recognition Results
WorldCard Link analyzes the business card information and sorts the information into the proper fields. You can edit the recognition result before exporting it to iPhone's address book and/or Card Holder.
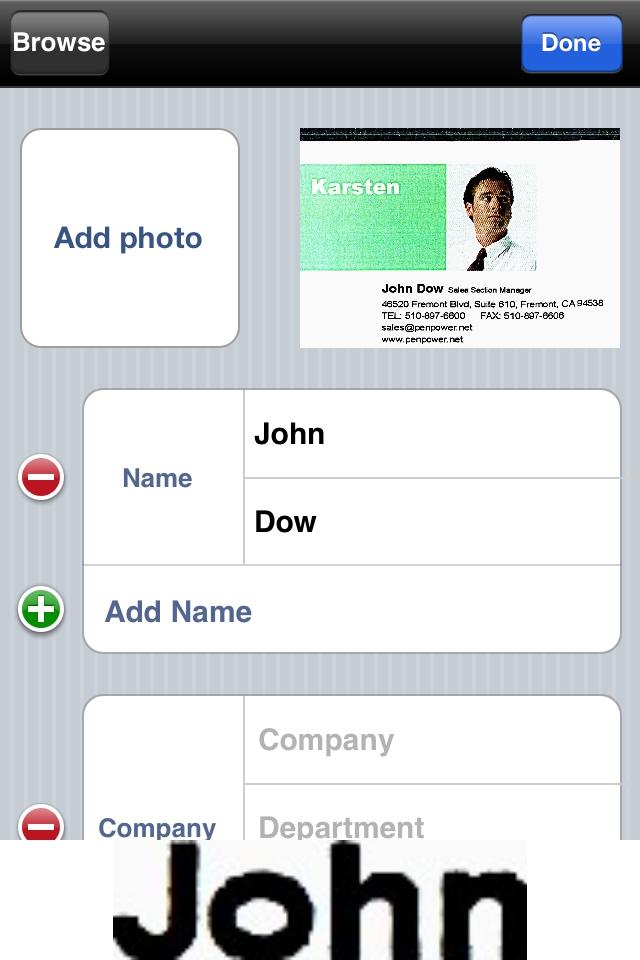
- Tap on any field, and you can edit the content of this field.
- When selecting a field, the corresponding image will be shown in the bottom of the screen for easy correction.
Tip: Tap the original image and flick left or right to see more.

- In the field editing screen, tap on the field name can change the field name. Tap
 to erase the words in this field.
- Tap the [Done] icon in the upper-right corner of the screen to save the editing result.
- When editing the address information, you can tap on the country field to select a country.
- Tap
 to add a new field and you can freely enter information in the field.
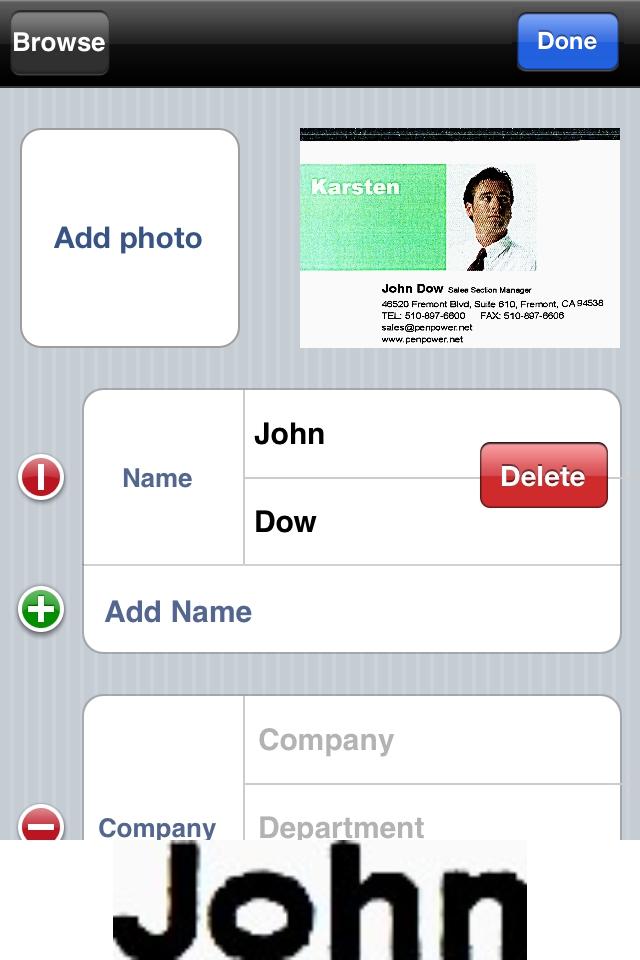
- To delete a field, please tap
 beside the field and tap the [Delete] icon.
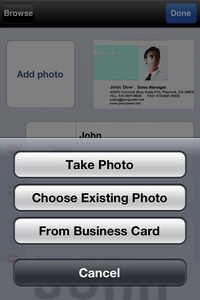
- Tap [Add Photo] and then select [Take Photo] to take a photo for this contact, select [From Business Card] to crop the profile photo from the business card, or select [Choose Existing Photo] to choose an existing photo for this contact.
- You can tap the [Group] field to select or add a subgroup to sort the business card.
Note: If you set Loccal Contacts as the current contact's source, you can choose whether to save the contact to iPhone contacts or not.
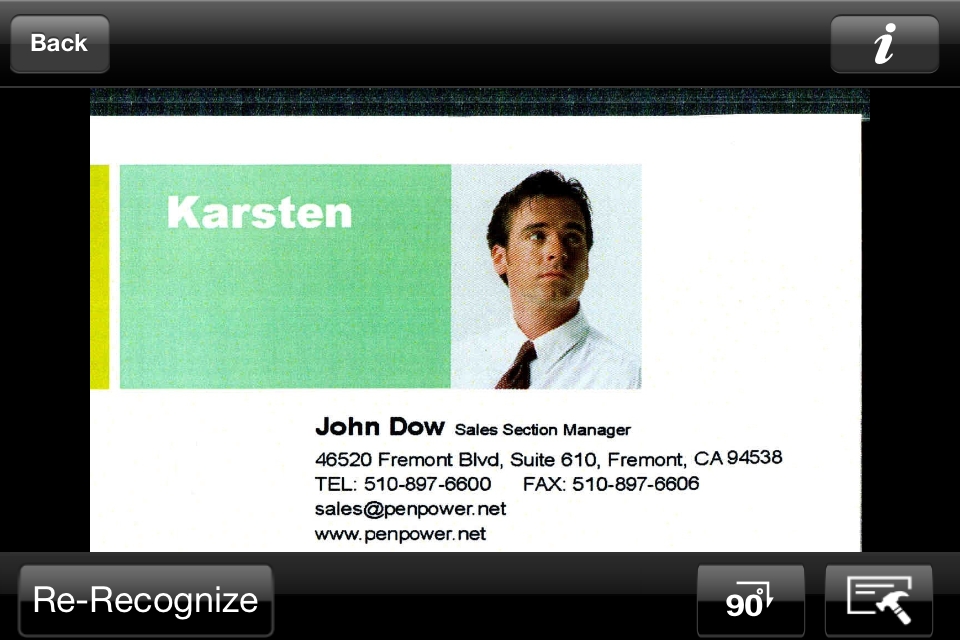
- Tap the [Browse] icon to view the business card photo.
You can pinch or double-tap to zoom in and out the photo or rotate iPhone sideways to check the business card. You can also partially recognize the business card by:
- Move the point on the upper-left or lower-right corner of the blue frame to select an area.
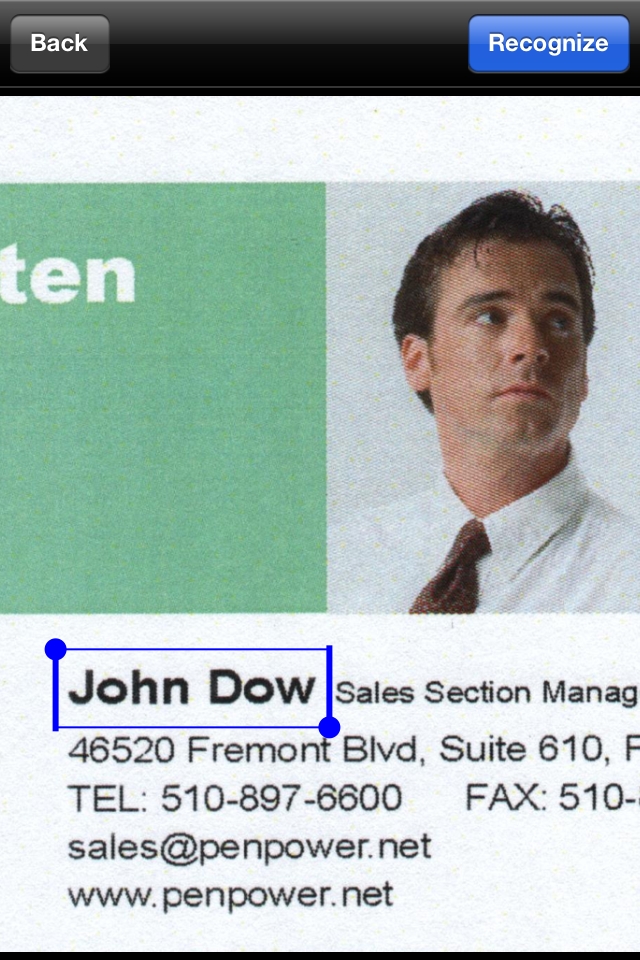
- You can also press on the information which has not been recognized or has been recognized incorrectly for 2 seconds, the blue frame will be automatically moved to this area.
- Tap the [Recognize] icon on the top-right corner of the screen.
- Scroll down or up to choose a field name and recognize the information into your desired field.
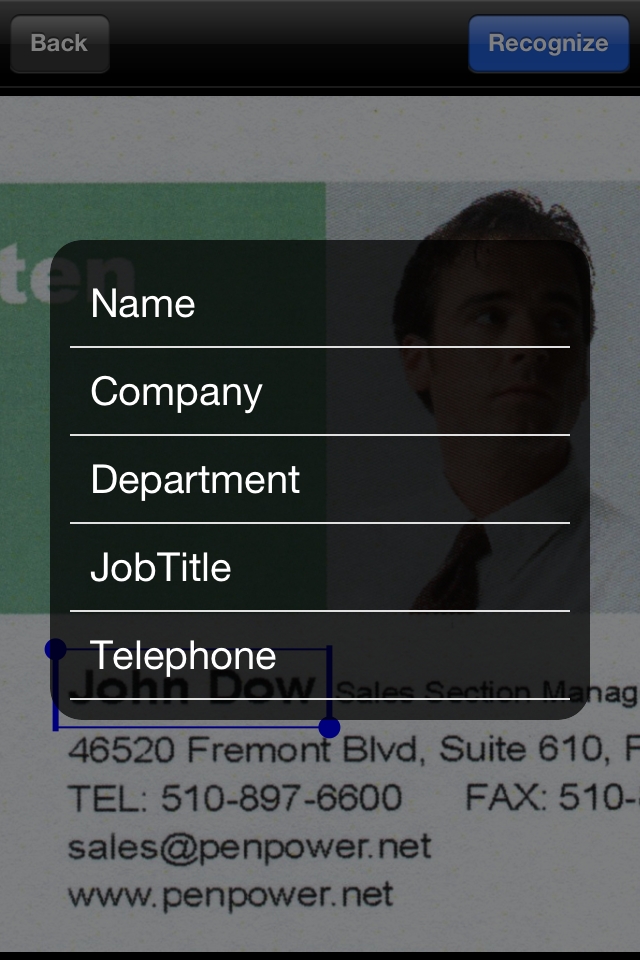
Tip: If the business card includes a photo, you can select the photo area and choose [Photo] field name to add the photo into the photo field.
View and Use Contact Information
You can view and use contact information right away after recognition.
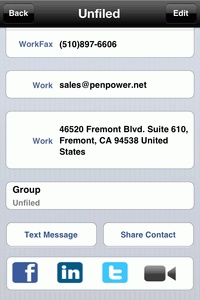
- Card Image: Tap on the card image to view and edit.
- Phone Number: Tap a phone number to call the contact person.
- Email: Tap the email address to send an email message to the contact person.
- URL Address: Tap the URL address to visit the website.
- Address: Tap the address to see the map or get directions.
- Text Message: Tap Text Message, select a number and then enter your message to send a text message.
- Share Contact: Tap Share Contact to share the contact information via email.
- Social networking services: Use this contact information to make a quick search of this person on [Facebook], [LinkedIn] or [Twitter].
- FaceTime: Tap
 to make video calls with this contact.
Edit and Use the Recognition Result in Card Holder
You can edit the contact later by selecting a contact in List Mode and then tap [Edit]. If you want to edit contacts in Cover Flow, you can select a contact, tap  , and then tap [Edit]. Most of the editing methods are similar to the regular WorldCard editing procedure. The additional feature available with Card Holder is:
Cover Flow Mode
Turn the iPhone horizontally to browse card images in Cover Flow. You can browse the card by flicking through the cards on the screen.
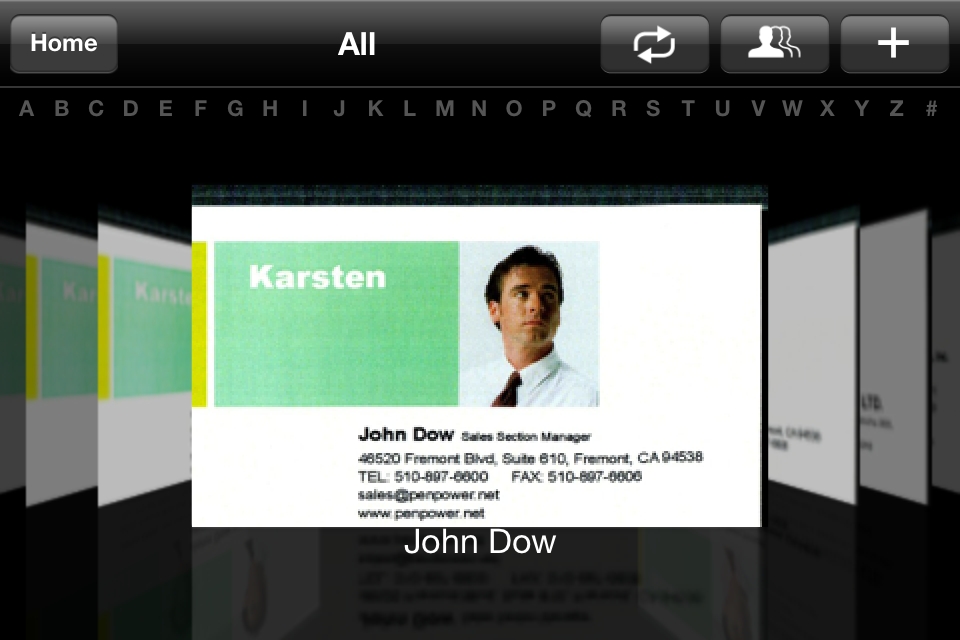
Tap a contact and then you can view or edit the card image and re-recognize it.
Groups
You can create groups in Card Holder to get your contacts in order. You can also edit or delete groups in Card Holder.
- Select a group -
1. Tap .
2. Select a group from the group list to view and edit the contacts in this group.
- Edit a group -
1. Tap .
2. Tap  to edit this group.
- Tap the
 icon and enter this group's name.
- Tap the icon of a group and then tap [Delete] to delete this group.
- Tap [Done] to exit the group editing screen.
Note: The group names which display in gray are default and cannot be edited or deleted.
Move and Delete Multiple Contacts
You can copy or move contacts freely between Loccal Contacts and Cloud Contacts, and the contacts can be edited individually in these two contact's sources. Tap in the Card Holder to select contacts for moving them to other groups or delete them.
Tip: You can select all contacts by tapping .
- Move Group: Select contacts and tap
 to
to
- Change Group - You can select more than one target groups to move the contacts to these groups.
- Copy Contacts - Tap [Copy to Loccal Contacts/ Cloud Contacts] to copy contacts to another contact's source.
Note: The contacts copied to another contact's source are independent. When you edit the copied contacts in the new contact's source, the contacts in the original contact's source will not be affected.
- Move Contacts - Tap [Move to Loccal Contacts/ Cloud Contacts] to move contacts to another contact's source.
Note: When you move or copy the contacts to another contact’s source, you can switch "keep original group" on to move or copy the contacts’ groups to that contact’s source as well. For example, if you move or copy a contact in “Friends” group in Cloud Contacts to Loccal Contacts, the contact will be saved in “Friends” group as well in Loccal Contacts.
- Delete contacts: Select contacts and tap
 . Then tap [Delete Contact] to delete the selected contacts.
Send Email or Messages to Multiple Contacts
Tap in the list view to send email or short messages to multiple contacts.
Tip: You can select all contacts by tapping .
- Mail - Select contacts and tap
 . Then select [Send email] to send email to the selected contacts.
- Text Message - Select contacts and tap . Then select [Text Message] to send messages to the selected contacts.
Export to the Cloud
Tap  and choose iCloud or Dropbox as the export destination.
iCloud
- Tap on the iCloud option to start the export process.
- Then the selected contacts will start to export to your iCloud account.
Dropbox
- Tap on the Dropbox option.
- Login your Dropbox account and start the export process.
- Then the selected contacts will start to export to your Dropbox account.
Export Worldcard exchange file(.wcxf)
WorldCard series, released by Penpower Technology, are business card recognition and contact management products, running on different platforms, ranging from WorldCard (Windows), WorldCard Mac (Mac OS X) to WorldCard Mobile/Local Contacts (iPhone / iPod touch). WorldCard series help users scan, recognize, and save contact information directly into digital database. Let you save your time and manage contact information quickly and easily. To learn more about WorldCard Series, please click here.
The proprietary WCXF (WorldCard Exchange File) format is used for the interoperable interchange of contacts between WorldCard series. WCXF files can be exchanged in three ways: [Export via iTunes], [Export via email], and [Open In]。
Note:
1. Only WorldCard Mobile 3.1.0 or later supports the .wcxf format.
1. Only WorldCard Contacts 2.3.0 or later supports the .wcxf format.
3. Only WorldCard (Windows) 6.5 or later supports the .wcxf format.
4. Only WorldCard Mac (Mac OS X) 2.2 or later supports the .wcxf format.
 Export to iTunes – The new File Sharing feature added to iTunes allows you to easily transfer files between your iPhone and computer. Simply convert your contacts to the .wcxf format and you can directly transfer the .wcxf file between your iPhone and a computer. To convert the selected contacts to a .wcxf file, please
- Select the contacts that you want to export.
- Tap
 and select [Worldcard exchange file(.wcxf)]
- Select [Export via iTunes].
- The selected contacts are converted into a .wcxf file right away. The name of this file will include WorldCard and the date, such as WorldCard0106.wcxf.
Important:
iTunes File Sharing requires: iTunes version 9.1 or later, Mac OS version 10.5.8 or later, and iPhone iOS version 4 or later.
 How does [WorldCard] or [WorldCard Mac] import the .wcxf file shared via iTunes File Sharing?
- Plug your iPhone to your computer, launch [iTunes], and select your iPhone from the [Device] section of iTunes.
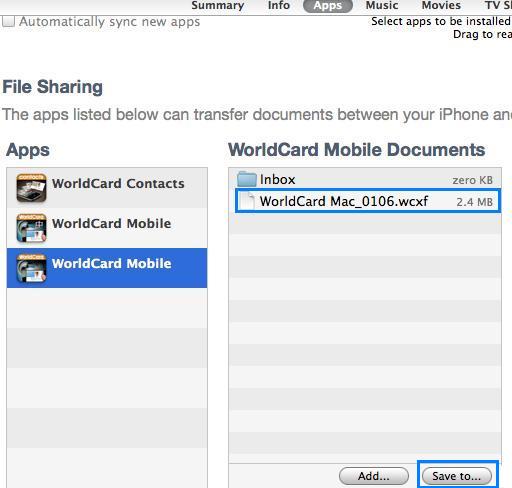
- Go to the [Apps] tab and scroll down. You will see the [File Sharing] section.
- On the left side of the screen, please choose [WorldCard Mobile] from the list of supported applications.
- The right side of the screen allows you to copy files from [WorldCard Mobile] to your computer. Select a .wcxf file and click [Save to…] to save the file to your computer.
- Run [WorldCard] or [WorldCard Mac].
- Select [Import] / [WorldCard Exchange File].
- Follow the import instructions to import this .wcxf file.
- Once the import process is completed, you can view the contacts in the .wcxf file in [WorldCard] or [WorldCard Mac] right away.
How does [WorldCard] or [WorldCard Mac] export a .wcxf file to WorldCard Mobile via iTunes File Sharing?
- Run [WorldCard] or [WorldCard Mac] and select the contacts that you want to export.
- Select [Export] / [WorldCard Exchange File].
- Follow the export instructions to export this .wcxf file.
- Plug your iPhone to your computer, launch [iTunes], and select your iPhone from the [Device] section of iTunes.
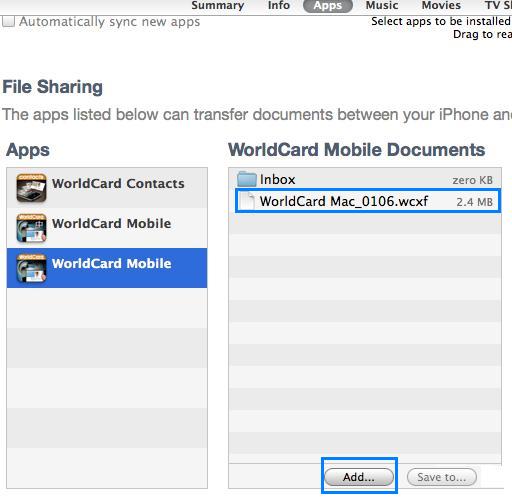
- Go to the [Apps] tab and scroll down. You will see the [File Sharing] section.
- On the left side of the screen, please choose [WorldCard Mobile] from the list of supported applications.
- The right side of the screen allows you to copy files from your computer to WorldCard Mobile. Click [Add…] and follow the instructions to add the .wcxf file in your computer to your iPhone.
- Return to your iPhone. Run WorldCard Mobile.
- Select [Settings] \[Import from iTunes File Sharing].
- Select the .wcxf file that you want to import into Card Holder and tap [Import]. The contacts in the .wcxf file will then be imported into Card Holder of WorldCard Mobile.
Export via email – Convert your contacts to the .wcxf format and export this file via email.
- Tap .
- Select the contacts that you want to export.
- Tap and select [Worldcard exchange file(.wcxf)].
- Select [Export via email].
- The mail app will be launched and the selected contacts will be converted to a .wcxf file and attached to email messages right away. The name of this file will include WorldCard and the date, such as WorldCard0106.wcxf.
Important: The default for the email export is a maximum of 10 records at one time. If you need to export more, then you can select [Export to iTunes].
How does [WorldCard] or [WorldCard Mac] import a .wcxf file?
- Open the mail including a .wcxf file and save the .wcxf file to your computer.
- Run [WorldCard] or [WorldCard Mac].
- Select [Import] / [WorldCard Exchange File].
- Follow the import instructions to import this .wcxf file.
- Once the import process is completed, you can view the contacts in the .wcxf file in [WorldCard] or [WorldCard Mac] right away.
How does [WorldCard Mobile] import a .wcxf file?
- Open the mail including a .wcxf file and tap the attached .wcxf file.
- An options window will appear on the screen. Please select [Open In].
- Choose the app where you want the contacts to import in the pop-up menu.
- The selected app will be launched and the contacts in this .wcxf file will be imported right away.
Note: The .wcxf file cannot be opened in web-mail service.
Open In – Launch the app (Local Contacts, for example) that supports the .wcxf format and import the selected contacts to it at the same time.
- Select the contacts that you want to export.
- Tap and select [Worldcard exchange file(.wcxf)].
- ASelect [Open In].
- Choose the app where you want the contacts to import in the pop-up menu.
- The selected app will be launched and the contacts in this .wcxf file will be imported right away.
Export Card image(.png)
- Tap .
- Select the card images that you want to export.
- Tap and select [Card image(.png)].
- Select [Export to iTunes] to export the images to iTunes, select [Export via email] to send the imges out via Email, or select [Save image to photos] to save the card images in iPhone.
Export CSV Files
Convert your contacts to different types of CSV files, such as Gmail Contact (.csv), iWork(.csv), and MS Excel 2003 (CSV) via iTunes or Email.
- Tap .
- Select the contacts that you want to export.
- Tap and select [Gmail Contact (.csv)], [iWork(.csv)], or [MS Excel 2003 (CSV)].
- Select [Export to iTunes] to export the contacts to iTunes, or select [Export via email] to send the contacts out via Email.
Tip:For [Export via email], the mail app will be launched and the selected contacts will be converted to a .csv file and attached to email messages right away. The name of this file will include WorldCard and the date, such as WCM_0201.csv.
Export VCF Files
Convert your contacts to different types of VCF files, such as Entourage 2008 (.vcf), MS Outlook(.vcf), and Mac Address book(.vcf) via iTunes or Email.
- Tap .
- Select the contacts that you want to export.
- Tap and select [Entourage 2008 (.vcf)], [MS Outlook(.vcf)], or [Mac Address book(.vcf)].
- Select [Export to iTunes] to export the contacts to iTunes, or select [Export via email] to send the contacts out via Email.
Export to iPhone Contacts
- Tap .
- Select the contacts that you want to export.
- Tap and select [Export to iPhone Contacts].
- Select a group which you want to export contacts into and the contacts will be saved in your phone immediately.
Settings
In the main screen, tap to enter the setting screen.
- Eastern Name Order: Set Eastern Name display sequence of the first name and last name.
- Western Name Order: Set Western Name display sequence of the first name and last name.
- Sorting By Field: Set to sort by the Name or Company field.
- Index mode: Set the index to follow English Alphabet, Chinese Stroke, Chinese HanPin, Chinese ZhuYin, Japanese Phonetic, or Korean Phonetic.
- Chinese Display: You can set the recognition results of the Chinese business cards to display with Simplified Chinese, Traditional Chinese, or the same as card info.
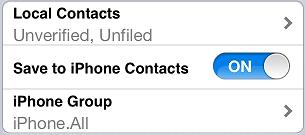
- Current contacts - Select the destination group where you want to save the contacts. If you select Cloud Contacts, you can synchronize the Gmail Contacts with WorldCard Link.
- Save to iPhone Contacts - Switching this function on will save the contacts created in Card Holder to both Card Holder and iPhone Contacts. This setting will be applied to new contacts.
- Account - Input email address and password of your Google account for synchronizing Gmail Contacts with WorldCard Link.
- Sync conflict handle rule - If the contact information has been
changed in both remote side and local side to cause a conflict, you can select a rule to manage it.
- Keep latest modified data - Synchronize according to the latest modified data.
- Keep local side data - Synchronize according to the data in the local side.
- Keep remote side data - Synchronize according to the data in the remote side.
- Reset sync relationship - If you reset sync relationship, next time your synchronization will be a new initial synchronization to merge the data in Cloud Contacts in Card Holder and Gmail Contacts.
- Save Image to Photos - Switch it on to save the business card image as well to the [Photos\Camera Roll] when exporting the contact information.
- Enhance image settings - Switch it on to automatically enhance every image added in the Card Holder.
- Filter duplicate - Switch it on to filter out the duplicate data while adding contacts into Card Holder.
- Import from iTunes File Sharing - You can receive the contact files that you've previously exported via iTunes file sharing. Tap [Import from iTunes file sharing].
- Import contact files - Choose which contact file you want to import. You may choose more than one file at a time. Then, tap [Import] to start importing contact files.
Notes:
1. WorldCard Link will automatically filter out contacts without business card images.
2. You need to copy a WorldCard Exchange File(*.wcxf) from your computer to WorldCard Link via iTunes File Sharing first before tapping this [Import] button to start importing contact data.
- Remove contact files from the importing list - Tap [Edit] and select which one you want to delete. Then tap [Done] to return to the previous screen to see the result.
- Find duplicate data- Tap to list the duplicate data. You can tap
 to see the contact information, or tap
  to delete the selected data.
- Activation - After the WorldCard Link app is installed, please activate the app with the activation code in the package and your email.
- Import WorldCard Mobile data (Local):If you have installed WorldCard Mobile in your phone, you can tap this option to import Local Contacts data from WorldCard Mobile to WorldCard Link. For importing Cloud Contacts data from WorldCard Mobile to WorldCard Link, you can synchronize Cloud Contacts in WorldCard Link with Gmail Contacts by using the same Gmail account which you used to synchronize with WorldCard Mobile.
- Privacy Policy - For protecting user's privacy, please tap it to view [Privacy Policy].
Troubleshooting
- What can I do if the synchronization stopped because of a phone call, Home button pressing, or etc?
Please turn on WorldCard Link and tap the synchronization button again. The synchronization will continue from where last time you stopped.
- When should I reset sync relationship?
Once you synchronize, a relationship is established, the data on both sides will be the same every time you synchronize. For example, if you clear all the contacts in one side, next time synchronization will remove all the contacts in another side as well. Therefore, if you want to synchronize the contacts on both side but don't want to delete contacts, you can tap “reset sync relationship”. When you reset sync relationship, next time your synchronization will be a new initial synchronization to merge the data in Cloud Contacts in Card Holder and Gmail Contacts.
- Once the sync relationship was reset, what can I do if contacts are duplicated after synchronization?
If contacts are duplicated, please go to Settings to tap Find duplicate data and delete the duplicate data.
- What can I do if the synchronization fails because network connection is unstable, server busy or other factors?
If synchronization fails because network connection is unstable or server is busy, you may switch to a more stable network, or try again later. WorldCard Link can record your last time synchronization information, including failed synchronization. Therefore, next time synchronization will continue from where last time you stopped
- How to transfer the data in WorldCard Mobile to WorldCard
Link iPhone?
- Synchronize with Gmail Contacts by the same Google account.
- Select contacts in WorldCard Mobile and export / open in with
WorldCard Link app.
- Export files in WorldCard Mobile to a cloud storage, such as
iCloud, and import the files to WorldCard Link from the cloud
storage.
- Export files in WorldCard Mobile as .wcxf files and import them
into WorldCard Link.
- Why should I change to using WorldCard Link from using
WorldCard Mobile?
WorldCard Link provides:
- More recognition languages.
- Automatically taking photos with dock mode.
- High quality photo image.
- How to move the data between two contact's sources, Local
Contacts and Cloud Contacts?
In the list mode, tap to select the contacts you
want to move and tap to select [Copy/Move to Local /Cloud
Contacts].
- Why should I take away the previous business card first for
taking a photo for the next business card in dock mode?
In dock mode, WorldCard Link will arm itself after cuing of [PENPOWER] on the business card stand. Once the app is armed, as soon as you put a business card on the card stand, the app will capture it automatically. If [PENPOWER] characters were be hidden or the app cannot cue the characters, you can tap on button to take a photo by manual.
- Will the contact information in iPhone update
automatically after I update the information in Gmail
Contacts on th web?
No, it is needed to synchronize Gmail Contacts with WorldCard Link's Cloud Contacts in iPhone by manual after you update any information in Gmail Contacts.
- Why did I update the data in Local Contacts category but the
data in Cloud Contacts category did not update?
The two contact's sources, Local Contacts and Cloud Contacts, are
two independent databases. When you update data in a contact's
source, the data in another contact's source will not be affected.
2013/02/23