Snap2PDF User Guide
Overview
Create New Document
Manage The Folders
Manage The Documents
Share and Print
OCR and Translate
Settings
Overview
- Taking Picture of Document
- Import Image
- Upgrade to full version
- Folder
- Advanced Menu
- Search
- Edit Folder
Return to Content
Create New Document
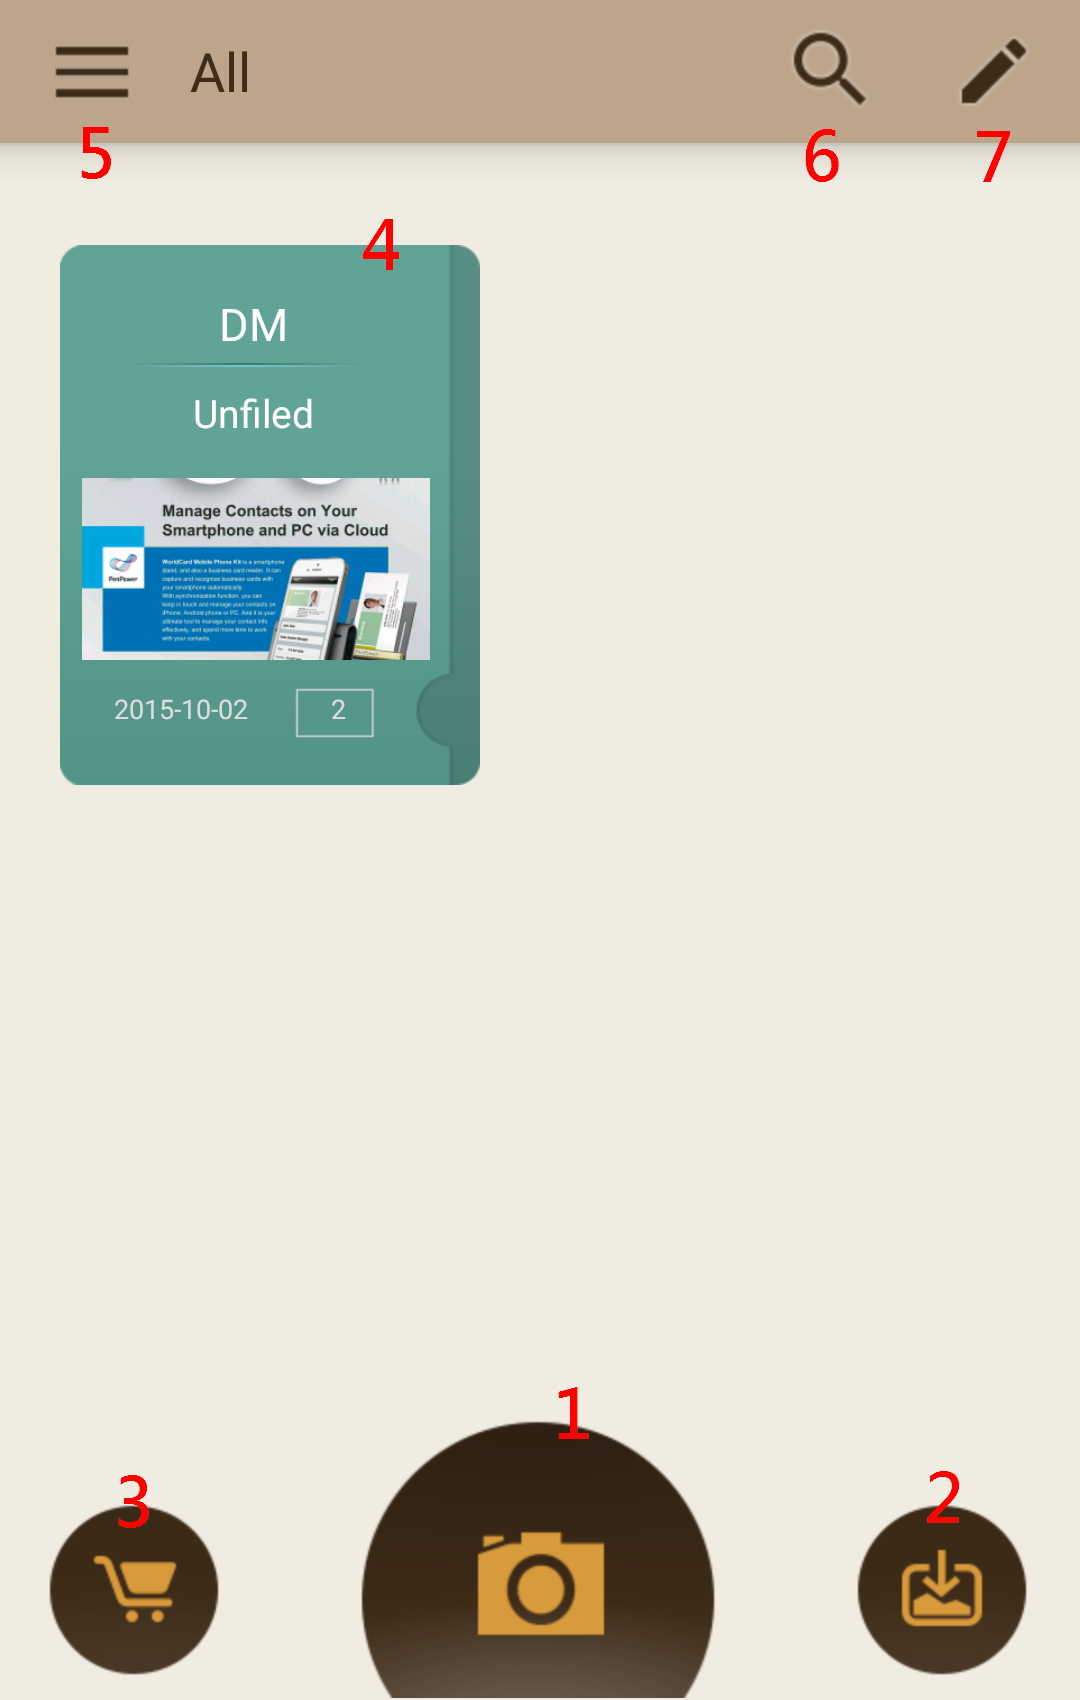
Taking Picture of Document
Tap  on the main
page to launch the camera to take pictures.
on the main
page to launch the camera to take pictures.
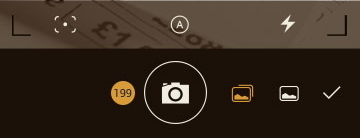
After launching the camera, tap  to set Auto Focus or Macro mode. Tap
  to set the options if you want to strengthen the picture automatically after
shooting. Tap
to set the options if you want to strengthen the picture automatically after
shooting. Tap  to set the mode of flashlight.
After setting, try to enlarge the document to full screen for getting best image
quality, and then tap  to shoot, a new folder will be created automatically after shooting.。
a. Strengthen the Picture
After shooting, the app will enter the preview page,
you can tap  to
rotate the picture, if you didn't set the auto strengthen or you want to adjust
more, tap
to
rotate the picture, if you didn't set the auto strengthen or you want to adjust
more, tap
 to enter adjust page, or you can tap
  to share, print or delete the document, please refer to
Share and Print for more details.
to share, print or delete the document, please refer to
Share and Print for more details.
If your document is papers, please  to crop your image;
if your document is a book, tap  to crop your image. Please adjust the area by dragging the point of the corners
to cut off the parts you don't want, and tap
to crop your image. Please adjust the area by dragging the point of the corners
to cut off the parts you don't want, and tap  to next step.
After cutting, you can tap  to change the image color, and tap
  to choose the image quality to save or tap
 and to rotate the
image, and then tap
the finish.
and to rotate the
image, and then tap
the finish.
b. Batch Shooting
At the shooting page, tap  to switch to batch shooting mode, there will be a counting number for every shot
and stopped until you tap
to switch to batch shooting mode, there will be a counting number for every shot
and stopped until you tap  to finish, after that, the app will switch to the preview page.
If you didn't set the auto strengthen
or you want to adjust more, tap
to enter adjust page to adjust.
Import Image
Tap  on the main page
to open the internal storage of your phone, find and check the images you want
to import, and tap [OK] to start importing and create a new folder.
on the main page
to open the internal storage of your phone, find and check the images you want
to import, and tap [OK] to start importing and create a new folder.
So far Snap2PDF support importing JPG and PNG formats.
Note: If you want to add new documents in the same folder, please enter
the folder and then tap  or
or  to add.
Return to Content
Manage The Folders
Add / Delete Folder
Taking picture or import images from the main page and finish adding new
documents, there will be a new folder created automatically, if you want to
delete the folder, tap  on the up-right of the main page, then you can select the folder you want to
delete, and tap
on the up-right of the main page, then you can select the folder you want to
delete, and tap  to
delete.
to
delete.
Note: The documents inside the folder will be deleted with the folder,
you can Move & Copy them to other folder.
Add Category
Tap  on the main page
to open the advanced menu, and tap
on the main page
to open the advanced menu, and tap  to setup the category of the folders.
Tap  on the
up-right corner to add a category, after adding few categories, you can tap
on the
up-right corner to add a category, after adding few categories, you can tap  and drag to change the sequence. You can just tap
  to delete the category.
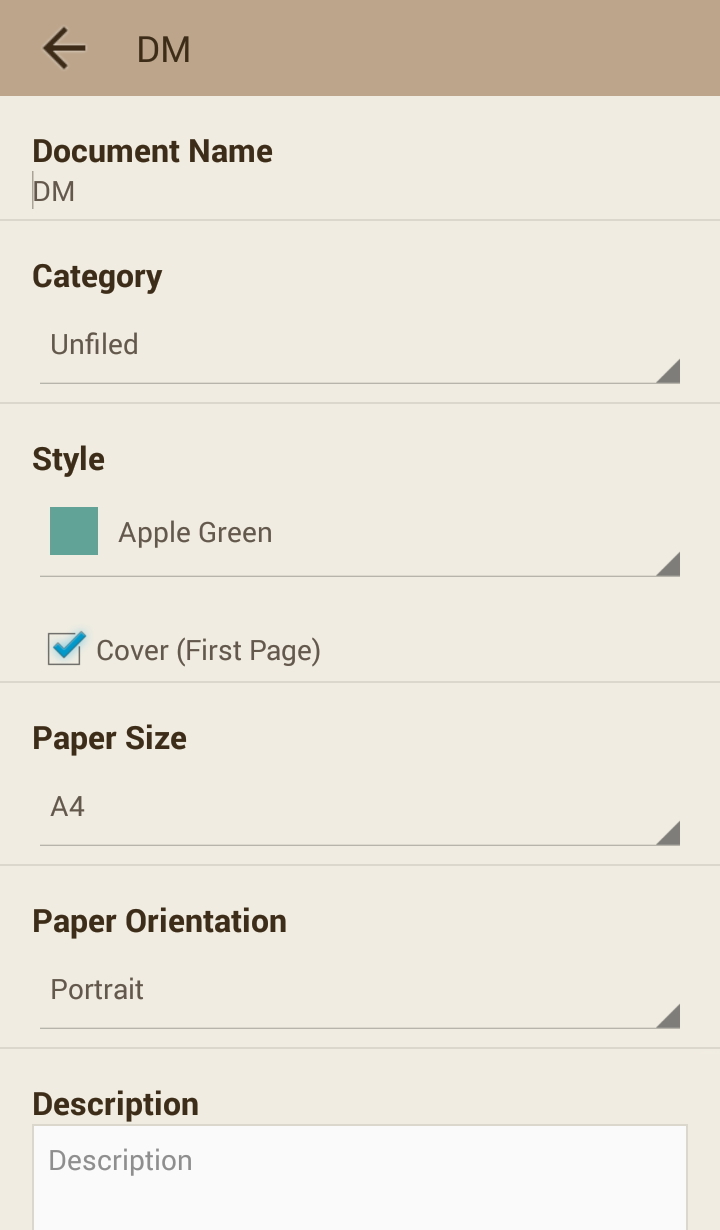
Folder Settings
Long press the folder will enter the setting page.
Here you can change the Folder Name, Category, Cover Style and others, also you
can set the print size of Google Cloud Print, and setup the keyword for
searching. Tap [Back] of the phone will auto save the changes.
Searching Documents
Tap  on the main
page and enter the keyword to search, it will compare the folder name and
keyword and list the results.
on the main
page and enter the keyword to search, it will compare the folder name and
keyword and list the results.
Return to Content
Manage The Documents
Add / Delete Document
Tap the camera function or import image function in the folder, then you can add
new documents in that folder, if you want to delete documents, tap
to edit and select the documents you want to delete or tap  to select all, and then tap
to delete, also you can long press on the document to move the position.
to select all, and then tap
to delete, also you can long press on the document to move the position.
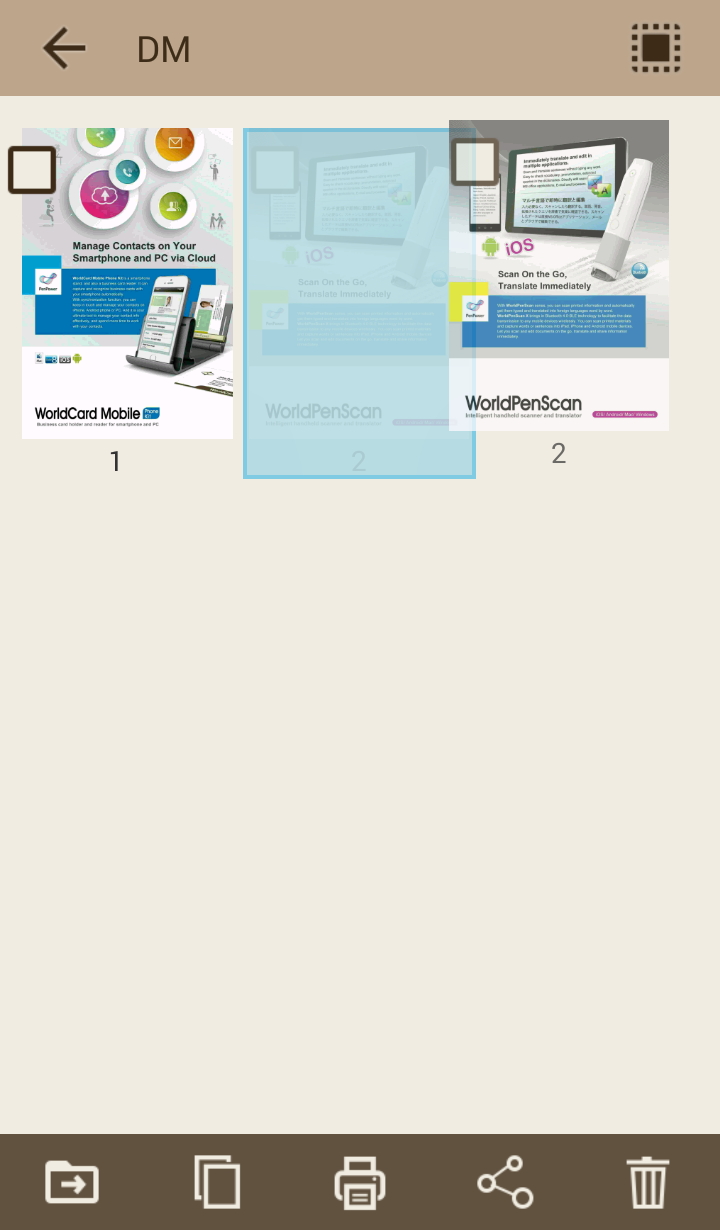
Move / Copy Document
After selecting the documents, tap  to copy or tap
  to
move them, the other folders will be listed for you to choose, choose your
destination to finish the movement.
to
move them, the other folders will be listed for you to choose, choose your
destination to finish the movement.
Return to Content
Share and Print
Google Cloud Print
If your printer has cloud print function, please remember to setup the
connection of the printer and your Google Cloud Print account first.
After choosing a folder or document, please tap  to open the print settings, and please log in your Google account first, then choose the printer you want to use,
also set the
numerous and color you want to print, and then start to print.
to open the print settings, and please log in your Google account first, then choose the printer you want to use,
also set the
numerous and color you want to print, and then start to print.
If you
have any question about this function, please tap [Google
Cloud Print Help] button for more information.

Share Document
Select the folder or document and tap  to share, you can share the file via E-Mail, export the file to the internal
storage of your phone, or upload to the cloud storage to share.
to share, you can share the file via E-Mail, export the file to the internal
storage of your phone, or upload to the cloud storage to share.
First time using the cloud storage will show the login page for you to log in,
please refer to the next chapter for more details.
Note: If you export to the internal storage of your phone, you can find
the exported document in the Snap2PDF folder of your
internal storage.
Return to Content
OCR & Translate
Characters Recognition
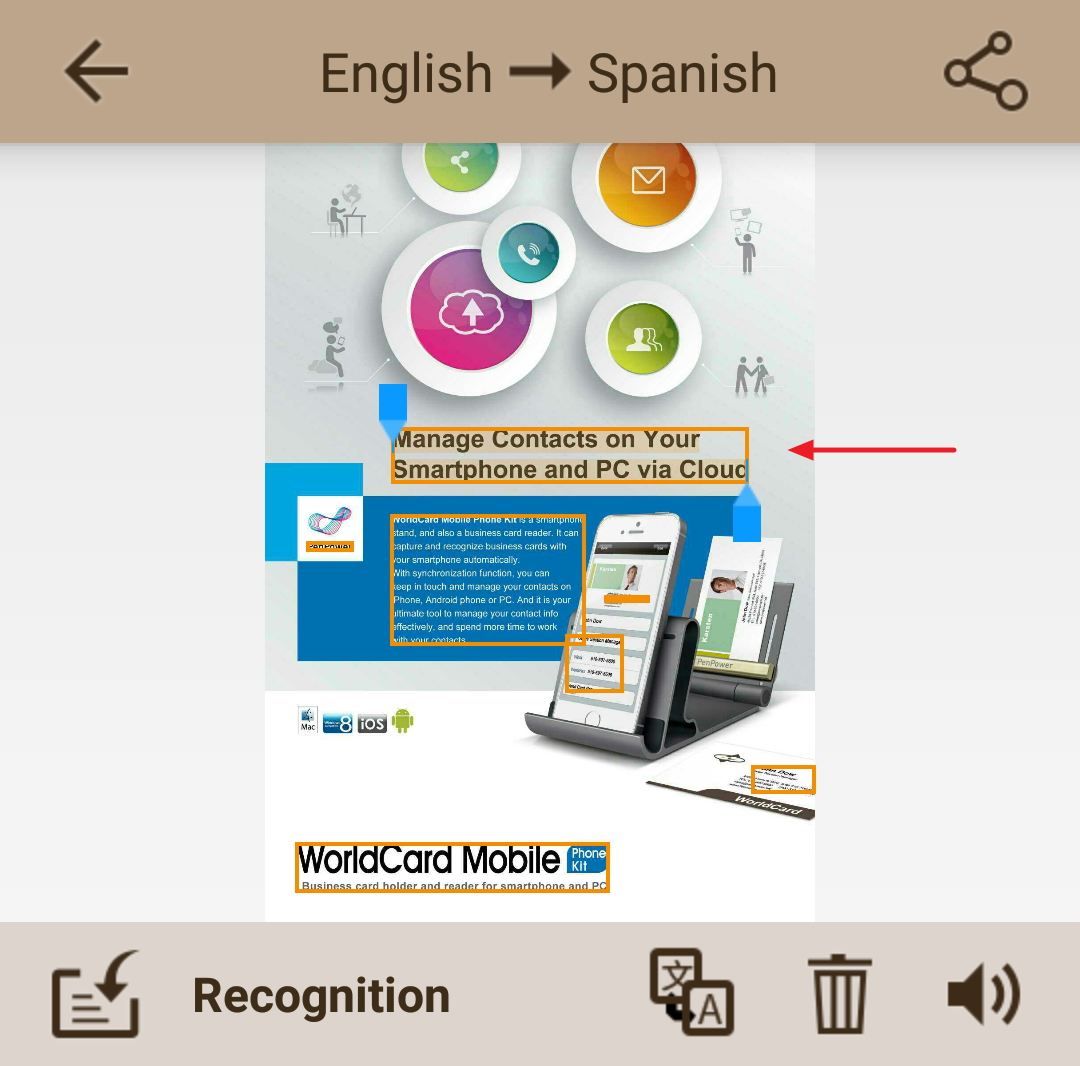
In the single page view, tap
to open the menu, and tap [Recognition] to choose the language of the document,
and then the Sanp2PDF will analyze and highlight the areas which have characters
on the document.
After that, you can tap any highlighted area, drag the arrow to adjust the range
of texts you want to recognize as the picture below, and then tap  to do the recognition.
If you want to change the language and recognize again, please tap
 and
choose the in the left side list, and then tap
to
recognize again.
and
choose the in the left side list, and then tap
to
recognize again.
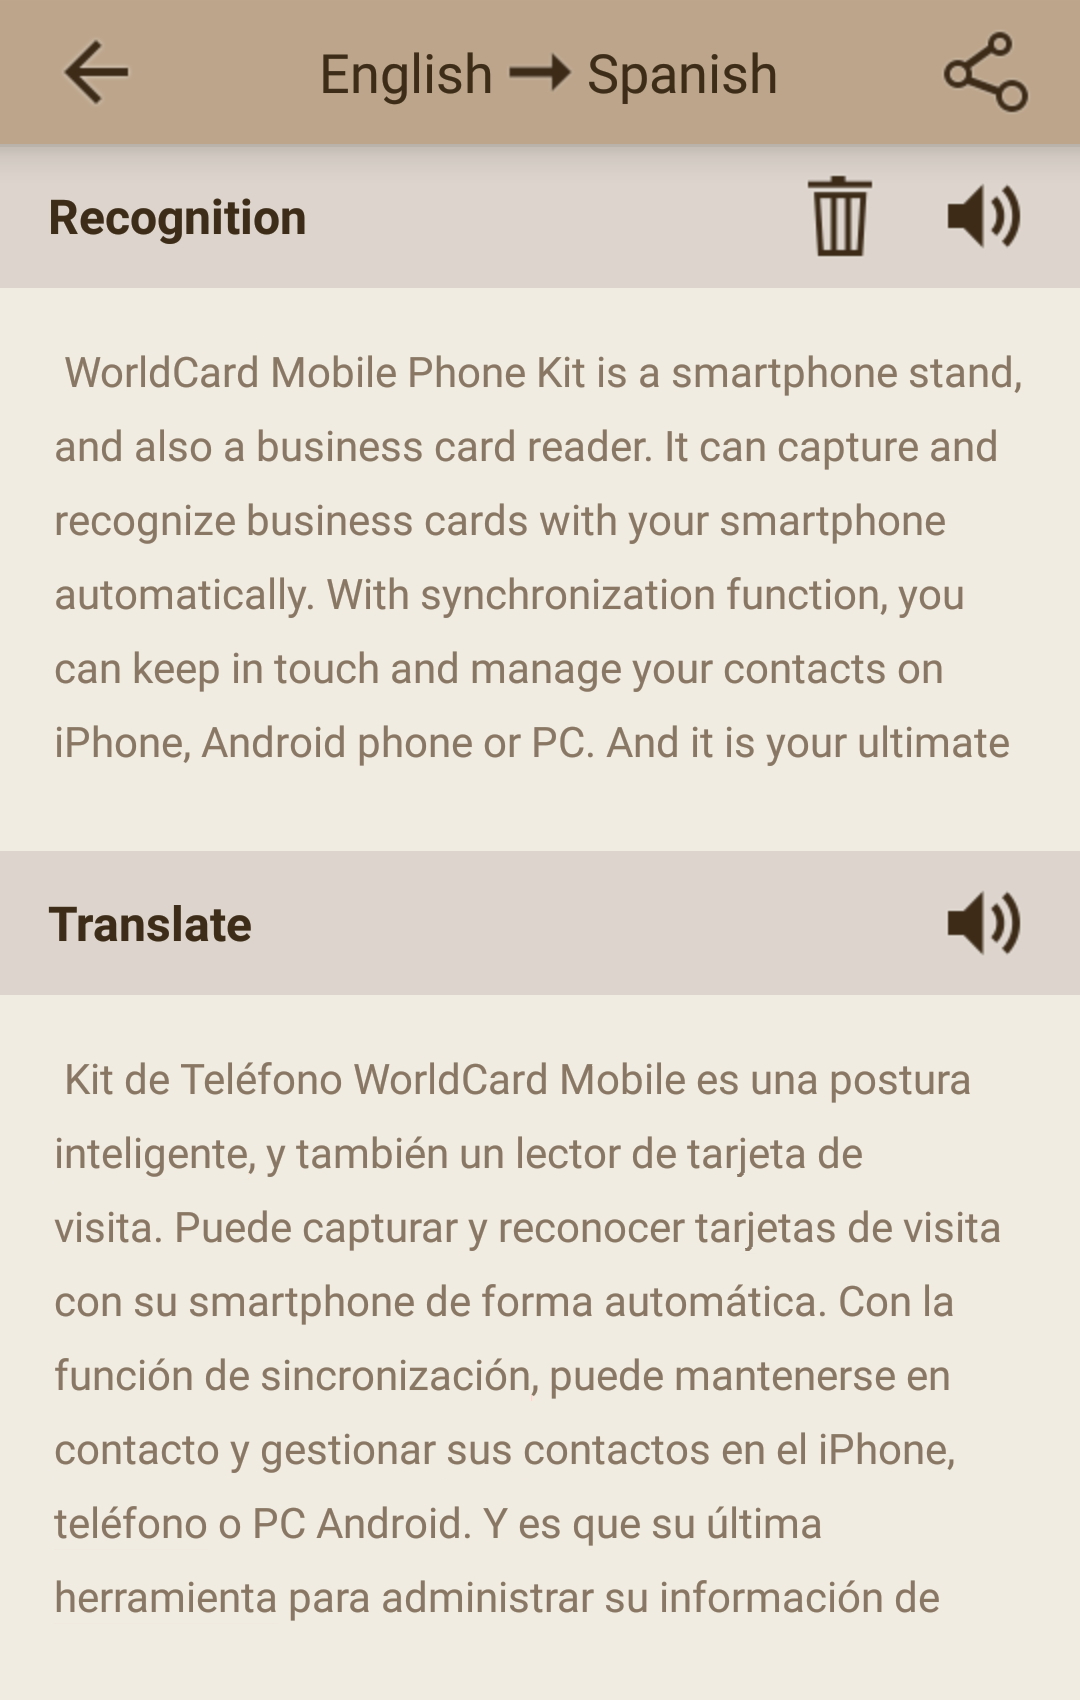
When there has results, you can tap  to clear or tap
  to
listen the pronunciation.
to
listen the pronunciation.
When you tap  to get
back, it will ask you to save the results or not, once you saved the results,
next time you tap ,
there will be a new [Browse] item in the menu for you to review the results you
saved; If you want to modify the results, you have to do the recognition again.
to get
back, it will ask you to save the results or not, once you saved the results,
next time you tap ,
there will be a new [Browse] item in the menu for you to review the results you
saved; If you want to modify the results, you have to do the recognition again.
Online Translation
You can also translate the recognized characters, please tap
first,
and choose the language you want to translate to in the right side list,
and then tap
to confirm and tap  to translate.
After that, you can
tap to listen the
pronunciation or tap  to share the translations.
Settings
Cloud Account Setting
Tap on the main page
to open the advanced menu, and tap  to open the settings.
Tap [Log in Cloud Account]
, and choose the
cloud storage such as Dropbox, Google Drive that you are going to,
the log in page will open for you to enter the log in
information to finish logging.
Translation
You can choose to set Google translation or Baidu translation as the default
translate engine.
Return to Content
2015/10/05