Snap2PDF Help (iPhone/ iPad)
Overview
Create Documents
View and Edit Documents
Manage Documents
Organize Documents
Settings
Overview
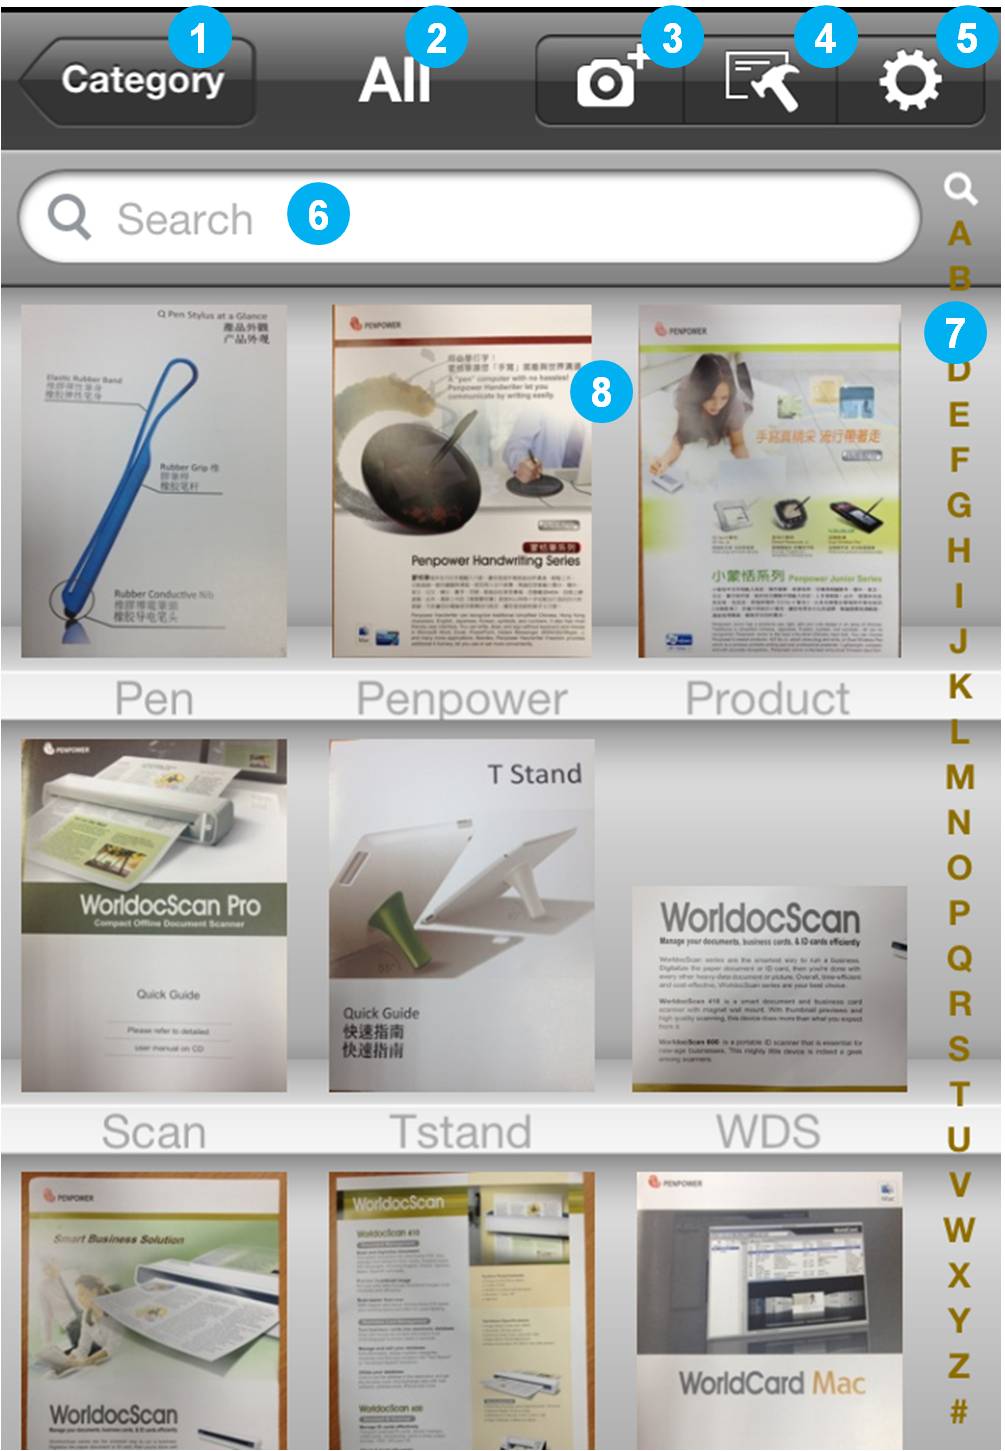
1. Category
2. Current Category Name
3. Create Document
4. Manage Document
5. Settings
6. Search
7. Index
8. Document Thumbnails
Tips: Snap2PDF supports iPad in portrait/landscape modes, and iPhone in portrait mode only.
Create Documents
Choose one of the following approaches to add documents into Snap2PDF.
Step 1. Tap  to choose a source of the document.
a. camera
b. album
a. camera
1. Select [Camera].
2. Tap  to focus and take a picture of a page.
Tips:
1). Please take snapshots in good lighting conditions and avoid reflections and shadows.
2). Tap the flash button to set the flash to Auto, On, or Off.(iPhone 4 or above)
3). You can rotate iPhone sideways to make sure the whole page is completely in the frame area.
b. album
1. Select [Album].
2. Choose an existing document image in the album, including the screenshots.
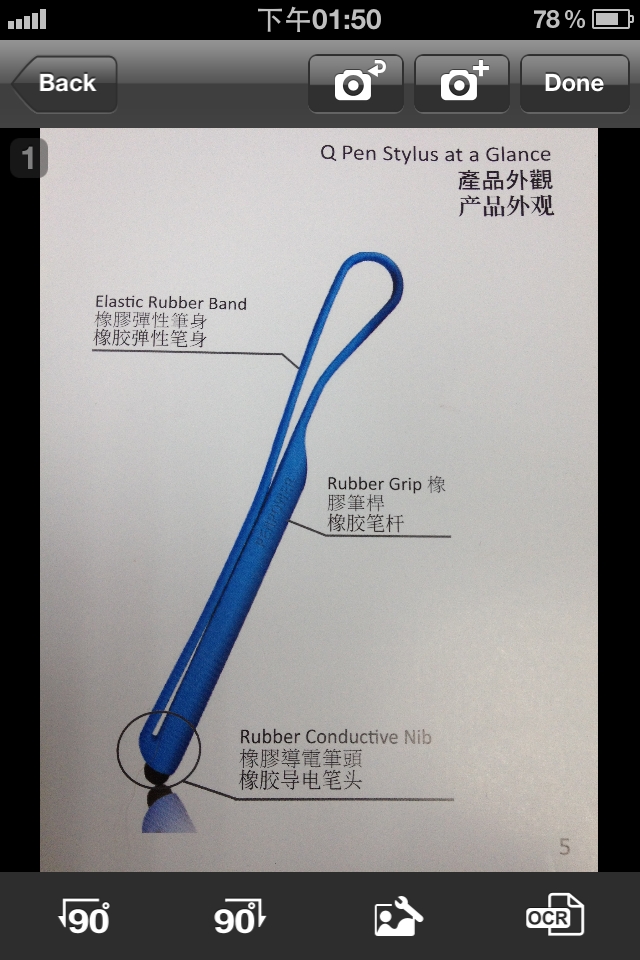
Step 2. Preview the image.
- Tap
 or
or  to rotate the image to proper orientation.
- Tap
 to adjust the image.
- Select
 to crop image.
- Select
 to dewarp the distorted image.
- Then tap [Preview] and [Done] to apply and save the modification.
Tip: You can tap  to retake a picture or
  to reload the image.
Step 3. If you want to edit or search the text in the document, you can apply the OCR Text Recognition to the image.
- Tap
 .
.
- Choose a recognition language to start recognizing text on the page.
Tip: This version supports English, French, Germany, Spanish, Italian, Portuguese, Dutch, Traditional Chinese, Traditional Chinese(Hong-Kong), Simplified Chinese, Japanese, Korean, Korean+Hanja, Czech, Danish, Finnish, Hungarian, Polish, Romanian, Russian, Slovak, Swedish, Indonesian, Norwegian, and more to come.
Step 4. Tap or  to continue adding more pages to this document.
Step 5. If you are ready to save the document, please
- Tap [Done].
- Input the file name and other details about this document.
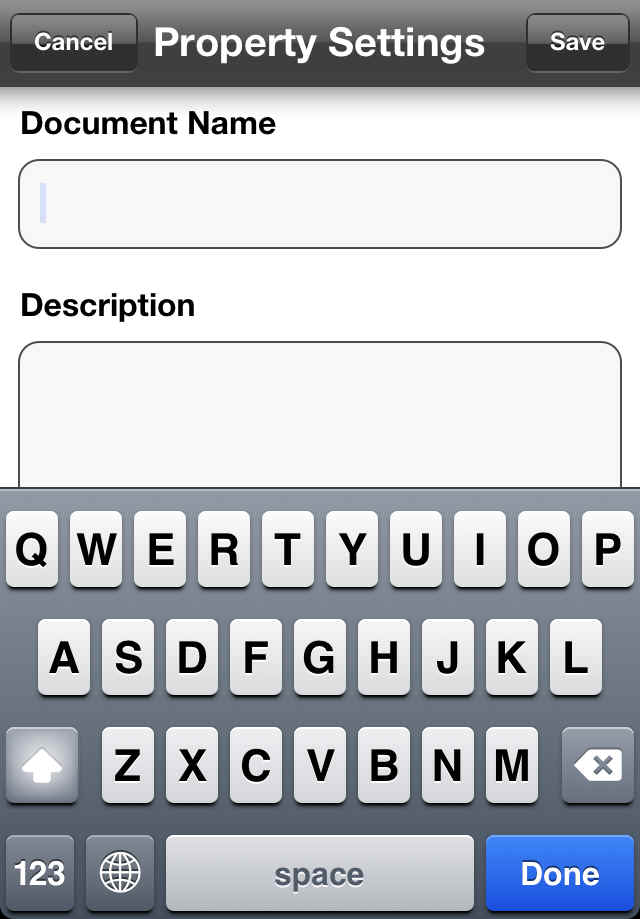
Notes:
1. The file name field cannot be empty.
2. The texts in fields of Document Name, Description, and Keyword can be used for searching.
Return to Content
View and Edit Documents
In the main screen, the documents are displayed as thumbnail images with file names. Tap on the document on the shelf.
open a document
add pages
delete pages
rearrange page order
view and edit document details
email this document
open a document in another PDF viewer app
open a document
1. Tap on the document on the shelf. The document will be opened, with each page thumbnail listed on screen.

2. Tap on the page thumbnail to view the document.
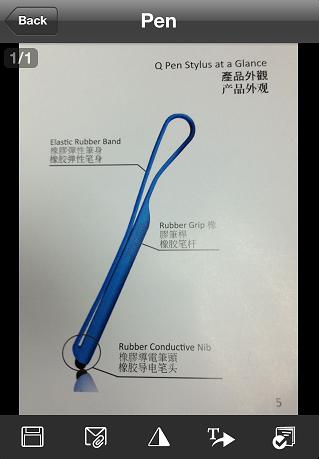
Tip: If this document contains more than one page, you can flick up and down to scroll through the document.
3. You can tap the buttons on toolbar to find more functions.
- Tap
 to save this page image to photo albums.
- Tap
 to email this document image.
- Tap
 and [Done] to enhance the photo quality.
- Tap
 to enter editing mode. Please tap and hold on a word to select a paragraph, then click
  to add the paragraph to the text board. The paragraph is now editable. You can sent the text out by email
  or SMS
  . Moreover, tapping
  can see the translations of the paragraph and tapping
  can copy the paragraph to Clipboard.
- Tap
 to turn on dictionary function.
- When the dictionary is turned on, you can select the languages you want to translate from and translate to at the lower right corner. Tap
 to fold/unfold the language bar.
- Tap on any word to see its translation. For more translation results, please tap
 .
.
Tip:
1. The languages you can select to translate from include Chinese-Traditional(Landscape/Portrait), Chinese-Simplified(Landscape/Portrait), Chinese-HongKong(Landscape/Portrait), Czech, Danish, Dutch, English, Finnish, French, German, Hungarian, Indonesian, Italian, Japanese(Landscape/Portrait), Korean, Korean+Hanja, Norwegian, Polish, Portuguese, Romanian, Russian, Swedish, Spanish, Slovak, and etc.
2. The languages you can select to translate to include Afrikaans, Albanian, Arabic, Armenian, Azerbaijani, Basque, Belarusian, Bengali, Bulgarian, Catalan, Chinese-Traditional, Chinese-Simplified, Croatian, Czech, Danish, Dutch, English, Esperanto, Estonian, Filipino, Finnish, French, Galician, Georgian, Greek, Gujarati, HaitianCreole, Hebrew, Hindi, Hungarian, Icelandic, Indonesian, Irish, Italian, Japanese, Kannada, Korean, Latin, Latvian, Lithuanian, Macedonian, Malay, Maltese, Norwegian, Persian, Polish, Portuguese, Romanian, Russian, Serbian, Slovak, Slovenian, Spanish, Swahili, Swedish, Tamil, Telugu, Thai, Turkish, Ukrainian, Urdu, Vietnamese, Welsh, Yidish, and etc.
add new pages
1. Open an existing document.
2. Tap and choose [Camera] or [Album] to add a new page to this document.
delete pages
1. Open an existing document.
2. Tap [Edit].
3. Tap  next to the page that you want to delete.
4. Tap [OK] to delete.
5. Tap [Done] to save the modification.
rearrange page order
1. Open an existing document.
2. Tap [Edit].
3. Drag the page thumbnail into the order that you want.
4. Tap [Done] to save the modification.
view and edit document details
1. Open an existing document.
2. Tap  to view the document details.
3. If you want to edit the details, please tap [Edit].
Tip: The texts in fields of Document Name, Description, and Keyword can be used for searching.
4. Tap [Save] to save the modification.
email this document
1. Open a document.
2. Tap  .
.
3. Send this document as an email attachment in .pdf format with the file name as the email subject.
open a document as a PDF file in another PDF viewer app
You can open a document in another PDF viewing app.
1. Open a document.
2. Tap  .
.
3. This document is then generated into a pdf file.
4. Tap 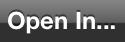 .
.
5. Choose an app from the pop-up menu to open this document.
Return to Content
Manage Documents
Tap on the Manage icon  . Select one or more documents.
Then choose one of the following functions.
Tip: Tap  to select or un-select all contacts in the targeted group at one time.
move documents to another category
email documents
export to Dropbox
passcode protection
delete documents
move documents to another category
1. Tap  and choose the destination category.
2. The change takes effect right away after you select the destination category.
email documents
1. Tap .
2. Send the selected documents as email attachments in .pdf format.
export to Dropbox
1. Tap  .
.
2. Select a Dropbox account.
3. Login your Dropbox account to start the export process.
4. Selected documents will start to export to your Dropbox account.
Note:
First, add a Dropbox account in the list. Please refer to Settings.
passcode protection
1. Tap  .
.
2. Enter the passcode you set.
Tip: For using passcode protection function, please go to [settings] to switch [Passcode Lock] on and set your passcode first, and then you can use this passcode to protect your documents.
3. When the document is locked, it cannot be opened without entering passcode.
delete documents
1. Tap  .
.
2. Tap [OK] to delete.
Return to Content
Organize Documents
To find a document quickly, you can simply organize documents into different categories, use the searching function, or use the index to jump to a letter.
Categories
Keyword search
Index
Categories
enter into a category
add a new category
delete a category
move documents to another category
enter into a category
If you know the document that you are searching for is in a category, you can simply jump to that category to get the document.
1. Tap  .
.
2. Select a category in the list to view and access the documents in this category.
add a new category
1. Tap and [Edit].
2. Tap  and enter a new category name.
3. Then tap [Done] to save the change.
delete a category
1. Tap and [Edit].
2. Tap next to an item, then Delete to delete the category.
3. Tap [Done] to save the change.
Note: Category "All" and "Unfiled" are preset categories that cannot be deleted.
move documents to another category
1. Tap the Manage icon .
2. Select the documents that you want to move.
3. Tap and choose the destination category.
4. The change takes effect right away after you select the destination category.
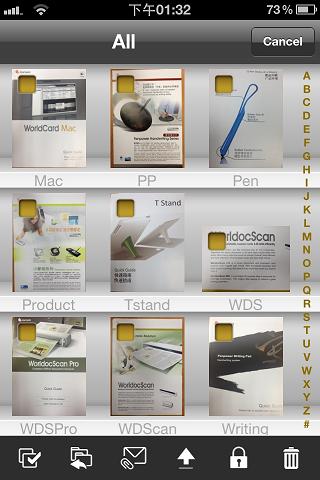
Keyword search
1. Tap  .
.
2. Type keywords in the search field.
Tip: Use quotation marks around the phrase ("contact management" for example) if you want to find the documents containing these specific words appearing together. If you don't use quotation marks, the search result will return only documents with both words ("contact" AND "management") but not necessarily appearing together.
3. The search results are shown as you type.
Notes:
1. The fields of document name, description, and keyword are searched by default.
2. The text of the page that has been recognized will be searched, too.
jump to a letter in the index
Documents are arranged and sorted in order. You can use the index to quickly jump to a letter.
1. Tap the desired letter in the index bar.
2. Jump to that letter in your document list.
Tip: You can customize the order in which files appear in Settings.
Return to Content
Settings
Tap  to set preferences for image size, Dropbox account, and index mode.
Image Size:
You can set the image size as different resolution.
Dropbox:
- Tap [Add account].
- Enter your Dropbox account name.
- Tap [Save] to save this account into the Dropbox account list.
Tips:
1. You can add more than one Dropbox account into the list.
2. If you want to remove this account from the list, please tap [Delete Account].
Indexing:
- English Alphabet: Set the index to follow the English Alphabet order.
- Chinese ZhuYin: Set the index to follow the Chinese Zhuyin order.
- Chinese HanPin: Set the index to follow the Chinese Pinyin order.
- Japanese Hiragana: Set the index to follow the Japanese Hiragana.
- Korean Hangul: Set the index to follow the Korean Hangul.
Passcode Lock:
Switch [Passcode Lock] on to set a passcode and you can use the passcode to protect your documents in the future. If you want to change the passcode, please tap [Change Passcode] to type old passcode first and type your new passcode.
Help: Tap to look on this user manual for instructions on how to use Snap2PDF.
About: Tap to see the information of Snap2PDF.
Return to Content
2012/11/26